Category: Blog

Your blog category

  • Understanding Vertical Cracks in 1970s Homes: Expert Advice

    Understanding Vertical Cracks in 1970s Homes: Expert Advice

    You’ve viewed a 1970s house and spotted vertical cracks in the walls — and now you’re not sure whether to walk away or carry on with the purchase. I see this situation regularly, and the good news is that vertical cracks in older homes are often far less serious than they look.

    Key Takeaways

    • Vertical cracks in 1970s homes are common and frequently caused by normal thermal movement or shrinkage rather than structural failure.
    • The location, width, pattern, and whether a crack is live or dormant all matter more than the crack’s appearance alone.
    • 1970s construction methods and materials have specific characteristics that make certain crack types more likely.
    • Building Control and a structural engineer are your two key sources of professional guidance when cracks raise genuine concern.
    • Most vertical cracks can be monitored, repaired, or managed — they rarely mean a house is unsafe to buy.

    Why 1970s Homes Crack in the First Place

    Houses built in the 1970s are now over 50 years old. That’s half a century of seasonal temperature swings, ground movement, and gradual material deterioration. It’s entirely normal for a building of that age to show some cracking — the question is always what type of cracking, and what’s causing it.

    1970s UK housing was built predominantly with cavity wall construction using clay brickwork or concrete block inner leaves. Concrete blocks in particular are prone to shrinkage cracking as they cure and dry out over decades. This process can produce fine vertical cracks that look alarming but are structurally inconsequential.

    Many homes from this era also used lightweight aerated concrete blocks (sometimes called aircrete or Thermalite) for the inner leaf. These blocks have a higher moisture movement than dense concrete, meaning they expand and contract more noticeably with changes in humidity. Over 50 years, that repeated movement can open up fine vertical cracks at mortar joints or through block faces.

    Additionally, 1970s homes were often built on relatively shallow strip foundations. In areas with clay-rich soils — common across much of Yorkshire — seasonal ground movement (heave and shrinkage) can cause the structure above to move slightly. This movement often manifests as vertical or near-vertical cracking, particularly at corners and around window and door openings.

    Reading the Crack: What to Look For

    Not all vertical cracks are equal. When I assess a crack, I’m looking at several factors simultaneously before drawing any conclusions.

    Width and depth

    A hairline crack (under 0.1 mm) is almost always cosmetic. A crack between 0.1 mm and 1 mm is minor and usually requires only cosmetic repair. Once you’re looking at cracks wider than 5 mm, that warrants closer attention — though even then, width alone doesn’t tell the whole story.

    Pattern and location

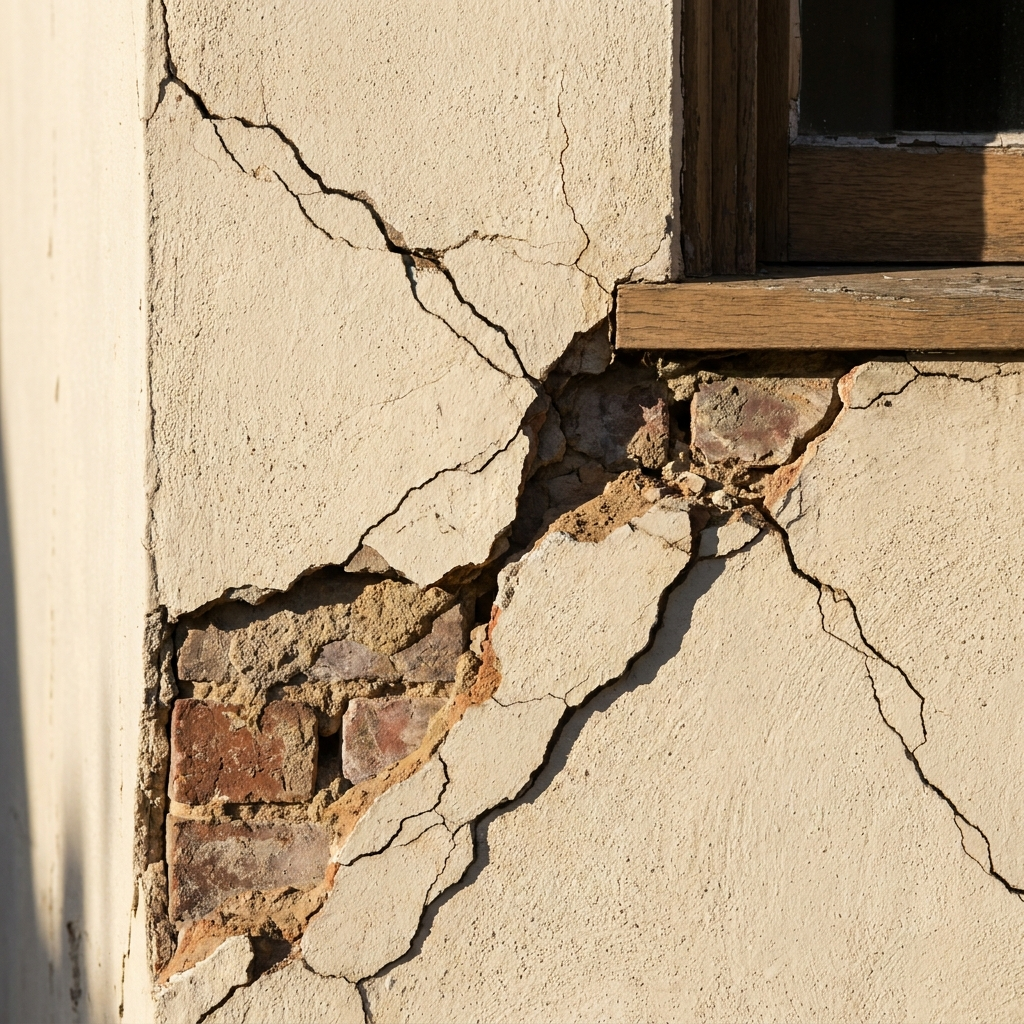
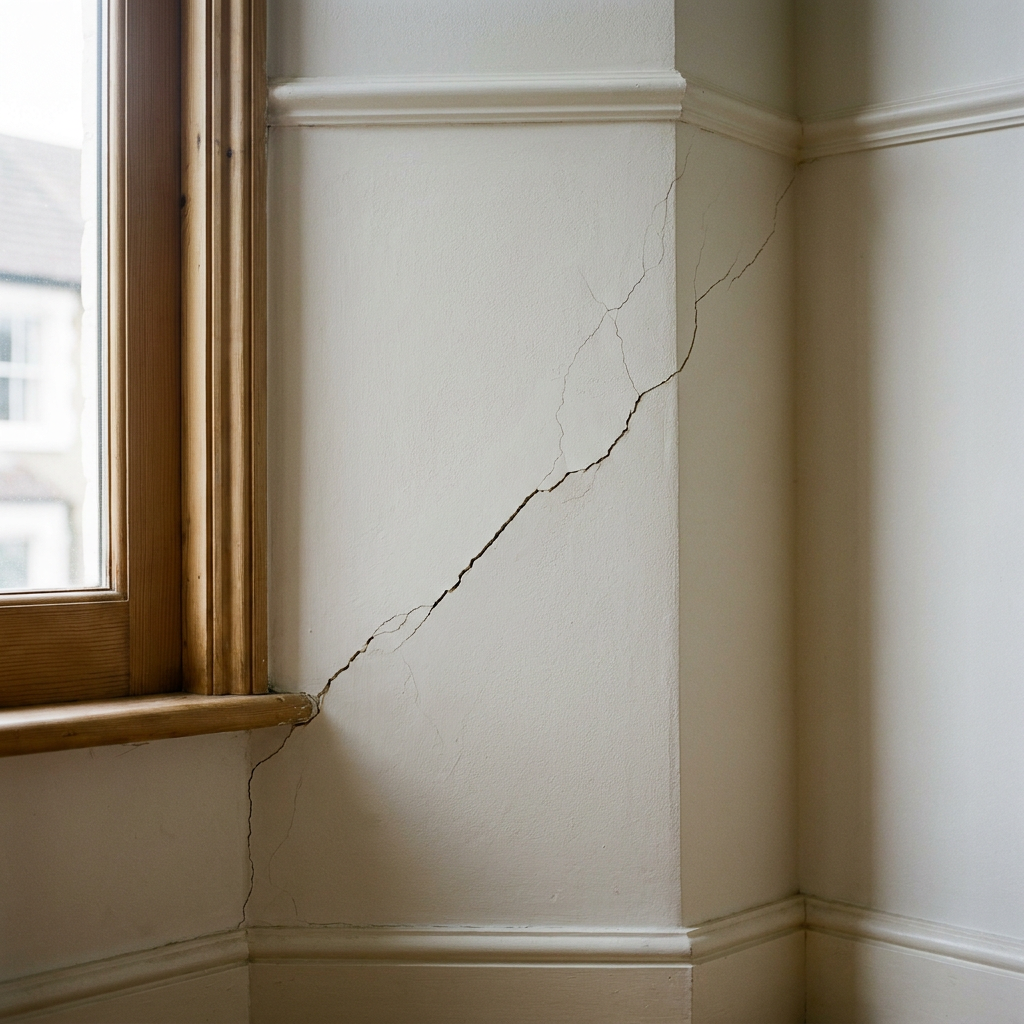
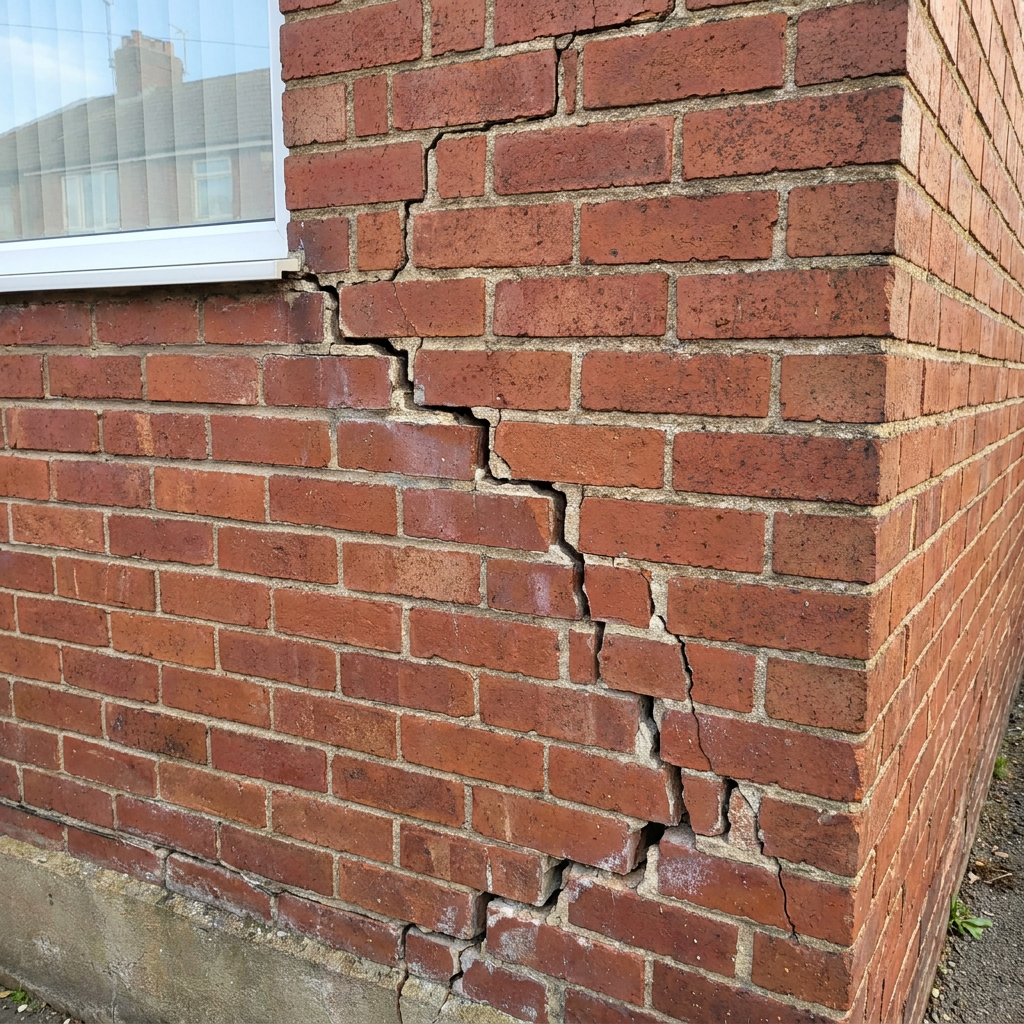
    Vertical cracks that run straight up through mortar joints are often a sign of differential settlement or thermal movement. Cracks that step diagonally through mortar joints in a staircase pattern are more typical of differential settlement. True vertical cracks that cut straight through bricks (rather than following the mortar) suggest a more significant force was at work.

    Pay particular attention to cracks near the corners of buildings, around window and door frames, and at the junction between an extension and the original structure. These are classic stress concentration points.

    Live versus dormant

    A dormant crack has stabilised and isn’t moving. A live crack is still opening or closing. You can’t tell this from a single viewing — which is one reason I always recommend monitoring before panicking. A simple tell-tale gauge or even a pencil mark across the crack with a date will show you whether it’s moving over weeks or months.

    Common Causes of Vertical Cracks in 1970s Houses

    Thermal and moisture movement

    This is the most common cause I encounter. Brick and block expand in summer heat and contract in winter cold. Over 50 years, this repeated cycle can open up fine vertical cracks — particularly at movement joints (or where movement joints should have been but weren’t installed). 1970s building practice wasn’t always consistent about incorporating movement joints in long runs of brickwork, so cracks sometimes appear where a joint was omitted.

    Shrinkage of concrete blocks

    As I mentioned above, concrete blocks shrink as they dry out. In a 1970s home, this process should be largely complete by now — which actually means shrinkage cracks you see today are likely dormant. That’s reassuring. If you see fine vertical cracks in a regular pattern on internal walls, shrinkage is the most probable explanation.

    Lintel deflection

    1970s homes used steel lintels over door and window openings. Over time, some of these lintels have corroded, particularly where cavity trays weren’t properly installed to keep water out. A corroding lintel expands as the rust forms, which can push the masonry apart and create vertical cracks at the sides of openings. If you see cracks running vertically from the corners of window or door frames, lintel condition is worth investigating.

    Subsidence and settlement

    True subsidence — where the ground beneath the foundations is actively moving — is less common than people fear, but it does occur. In Yorkshire, shrinkable clay soils are the main culprit, particularly after prolonged dry summers. Subsidence cracks tend to be wider at the top than the bottom, and they’re often accompanied by sticking doors and windows. Vertical cracks from subsidence are usually more irregular in shape than those from thermal movement.

    Poor construction or historic repairs

    Some 1970s homes were built quickly, and quality control wasn’t always what it should have been. Weak mortar mixes, inadequate foundations, or poorly tied extensions can all produce cracking that becomes apparent decades later. If the house has had extensions or alterations, the junction between old and new work is a particularly vulnerable spot.

    How to Assess the Risk Before You Buy

    If you’re viewing a house and you spot vertical cracks, here’s a practical approach I’d suggest before deciding how worried to be.

    First, photograph everything. Get close-up shots with a coin or ruler for scale, and wider shots showing the crack in context. Note which wall it’s on (internal or external, load-bearing or partition), which direction the crack runs, and whether it’s been previously filled and reopened.

    Second, check the crack width. You can buy a crack width gauge for a few pounds online, or use a credit card (0.76 mm thick) as a rough reference. If a crack is narrower than a credit card, it’s in the minor category.

    Third, look for associated symptoms. Are doors or windows sticking? Are there corresponding cracks on the opposite side of the wall? Is there any sign of damp at the crack? These associated symptoms shift the picture from minor to potentially significant.

    Fourth, ask the vendor. They’re legally required to disclose known structural issues. Ask whether any structural work has been done, whether there are any existing structural reports, and whether the property has ever been the subject of an insurance claim for subsidence or movement.

    Finally, commission a proper structural assessment if anything concerns you. A homebuyer’s survey from a general surveyor will flag cracks but rarely gives you the engineering analysis you need to understand what’s actually happening. A structural engineer will assess the cause, the risk, and the remedial options — giving you the information to make a properly informed decision.

    Repair Options and What They Cost

    I’m not going to give you specific costs here because they vary significantly by location, contractor, and the extent of work needed. What I can tell you is that most vertical cracks in 1970s homes fall into one of three repair categories.

    Cosmetic repairs — raking out and repointing, or filling and redecorating — are appropriate for dormant, minor cracks. These are straightforward jobs for a competent builder or even a confident DIYer.

    Structural repairs may be needed where a lintel has corroded, where a section of masonry has become unstable, or where differential movement has opened a significant crack. These require a structural engineer’s specification before any contractor starts work.

    Underpinning is the most significant intervention, needed when foundations are genuinely inadequate or where subsidence is ongoing. This is relatively rare and is usually only considered after thorough investigation has confirmed it’s necessary. Building Control involvement is required for underpinning work under Building Regulations Part A.

    When to Call a Structural Engineer

    You should get a structural engineer involved if cracks are wider than 5 mm, if they’re clearly live and growing, if they’re accompanied by sticking doors or windows, if they appear at the junction of an extension, if a lintel looks corroded or deflected, or if you simply want professional certainty before committing to a purchase. A structural engineer can tell you not just what the crack looks like, but what caused it, whether it’s likely to progress, and what — if anything — needs to be done about it. That’s the level of analysis that protects your investment.


    Need expert advice on this?

    I am a Chartered Structural Engineer (CEng, MIStructE) based in Huddersfield. The Beam Doctor offers two ways to get my expert input on your project:

  • Navigating Building Control: What UK Homeowners Must Know

    Navigating Building Control: What UK Homeowners Must Know

    You’ve just discovered that work carried out on your home — perhaps a wall removal, an extension, or a loft conversion — was never signed off by Building Control. It’s an unsettling position to be in, but you’re far from alone, and there are clear steps you can take to put things right.

    Key Takeaways

    • Building Control approval is a legal requirement under the Building Regulations for most structural and significant building work in England and Wales.
    • Unpermitted work can cause serious problems when you come to sell your home, remortgage, or make an insurance claim.
    • A regularisation application allows you to retrospectively obtain approval for completed work — but it involves inspection and possible remedial work.
    • A structural engineer’s report can support your regularisation application and give your solicitor and buyer confidence in the work.
    • Ignoring the problem is rarely the right answer; the sooner you act, the more options you have.

    What Building Control actually is — and why it exists

    Building Control is the system by which local authorities (and approved private inspectors) check that building work complies with the Building Regulations. In England and Wales, the Building Regulations set minimum standards for structural integrity, fire safety, drainage, insulation, ventilation, and more. Part A of the Regulations specifically covers structure — the bit that matters most when walls are being removed or openings are being formed.

    The purpose of Building Control isn’t to generate paperwork. It exists to make sure that work carried out on homes is safe for the people living in them, and for anyone who buys the property in the future. A Building Control officer will typically inspect the work at key stages — before a beam is covered up, for instance — and issue a completion certificate once everything meets the required standard.

    Without that oversight, there’s no independent confirmation that the work was done correctly. A beam might be undersized. A padstone might be missing. A load-bearing wall might have been removed without adequate support. These aren’t hypothetical risks — I see the consequences of uncontrolled structural work regularly in my practice.

    What counts as notifiable work?

    Not every job around the house requires Building Control approval. Replacing like-for-like windows, painting walls, and fitting a new kitchen (without altering drainage or structure) generally fall outside the scope of the Regulations. However, the following types of work almost always require notification and approval:

    • Removing or altering a load-bearing wall
    • Installing a steel beam (RSJ) or structural lintel
    • Building an extension (including single-storey rear extensions)
    • Converting a loft or garage into habitable space
    • Underpinning foundations
    • Installing a new structural opening for a window or door in a load-bearing wall
    • Most electrical work beyond like-for-like replacement

    If you’re unsure whether the work at your property was notifiable, the safest approach is to contact your local authority’s Building Control department directly. They’re generally helpful and won’t penalise you simply for asking a question. Alternatively, a structural engineer can advise you on whether the specific work falls within scope.

    It’s also worth understanding that Permitted Development rights — which allow certain extensions and alterations without planning permission — are entirely separate from Building Regulations. You can have Permitted Development rights and still need Building Control approval. The two systems operate independently, and conflating them is one of the most common misunderstandings I encounter.

    What happens if Building Control approval is missing?

    The practical consequences of missing Building Control approval tend to surface at two moments: when you try to sell the property, and when something goes wrong.

    At the point of sale

    Your solicitor is required to disclose building work to the buyer’s solicitor. If there’s no completion certificate, the buyer’s solicitor will flag it. This can cause a sale to stall or collapse. Some buyers will walk away. Others will ask you to reduce the price or take out indemnity insurance.

    Indemnity insurance — a word of caution

    Indemnity insurance is often presented as a quick fix. It’s a policy that protects the buyer (and their mortgage lender) against the financial consequences of enforcement action by the local authority. It does not confirm that the work is safe. It does not confirm that the work complies with Building Regulations. It simply provides financial cover if the local authority takes action — which, in practice, they rarely do for older work.

    Mortgage lenders are increasingly reluctant to accept indemnity insurance alone for structural work, particularly wall removals and beam installations. If the work looks significant, they may instruct their own surveyor, who may flag concerns that the insurance doesn’t address.

    If something goes wrong

    If a structure fails — a beam deflects excessively, a wall cracks, a floor sags — and there’s no Building Control sign-off, your insurer may question whether the work was carried out to a proper standard. That can complicate or invalidate a claim. More importantly, people can be hurt. Structural failures don’t always announce themselves in advance.

    The regularisation route: getting retrospective approval

    If the work at your property was carried out after 11 November 1985 and was notifiable but never approved, you can apply for regularisation. This is a formal process through your local authority’s Building Control department that allows completed work to be assessed retrospectively.

    Here’s broadly how the process works:

    • Submit a regularisation application — you’ll pay a fee (set by the local authority) and provide details of the work carried out.
    • Building Control inspects — an officer will visit the property. Depending on what’s been done and how accessible it is, they may ask for parts of the work to be opened up for inspection. This might mean removing a section of plasterboard to inspect a beam bearing, for example.
    • Remedial work if required — if the work doesn’t meet the required standard, you’ll need to put it right before a regularisation certificate can be issued.
    • Certificate issued — once satisfied, Building Control issues a regularisation certificate. This isn’t quite the same as a standard completion certificate, but it’s a formal record and is generally accepted by solicitors and lenders.

    The regularisation process can feel intrusive, but it’s genuinely the most reliable way to resolve the situation. A regularisation certificate gives future buyers and their lenders something concrete to rely on.

    How a structural engineer fits into this process

    A structural engineer can play a valuable supporting role in a regularisation application, particularly where the work involved structural alterations — wall removals, beam installations, new openings, and so on.

    When I’m asked to help in these situations, I typically carry out a site inspection to assess the existing structure. I’ll check the beam size against the span and loading, confirm whether padstones are present and adequate, and look at how the load is being transferred down through the building. I then produce a structural report setting out my findings.

    This report serves several purposes. It gives the Building Control officer independent professional evidence about the adequacy of the structure. It gives the homeowner clarity about whether the work is actually safe. And it gives solicitors, buyers, and mortgage lenders a document they can rely on — something more substantive than an indemnity policy.

    In some cases, I find that the work is structurally adequate despite the lack of formal approval. In others, I identify deficiencies that need addressing. Either way, knowing the true position is far better than hoping for the best.

    It’s also worth noting that Approved Document A, which supports Part A of the Building Regulations, provides guidance on structural requirements. A structural engineer working to current standards will reference this guidance as part of their assessment.

    What if the work is older than 1985?

    Regularisation only applies to work carried out after 11 November 1985. For older work, the regularisation route isn’t available. However, the structural concerns are just as real, and a structural engineer’s report can still provide evidence of the current condition of the structure.

    For sale purposes, older unauthorised work is generally handled through indemnity insurance, since the local authority’s enforcement powers are time-limited. But I’d always recommend getting a structural engineer to assess the work independently, regardless of the insurance position. A policy that pays out if the council takes action doesn’t tell you whether the beam over your kitchen is the right size.

    When to call a structural engineer

    You should involve a structural engineer as soon as you identify that structural work at your property lacks Building Control approval — particularly if that work involved removing walls, installing beams or lintels, or altering foundations. A structural engineer can assess whether the existing work is safe, produce a report to support a regularisation application, and give you an honest professional view of your position before you commit to a course of action. If you’re in the process of buying a property and a surveyor has flagged missing Building Control approval for structural work, that’s equally a situation where independent structural input is worth having before you exchange.


    Need expert advice on this?

    I am a Chartered Structural Engineer (CEng, MIStructE) based in Huddersfield. The Beam Doctor offers two ways to get my expert input on your project:

  • What to Do If You Find a Crack After Moving In

    What to Do If You Find a Crack After Moving In

    You’ve just moved into your new home, boxes still unpacked, and then you spot it — a crack running across the wall or ceiling that you’re almost certain wasn’t there when you viewed the property. It’s unsettling, and you’re right to take it seriously, but the good news is that not every crack signals a structural emergency.

    Key Takeaways

    • Most cracks in newly occupied homes are caused by minor settlement or thermal movement, not structural failure.
    • The size, shape, location, and pattern of a crack are the key factors in assessing its severity.
    • Cracks wider than 5 mm, or those appearing near structural openings, warrant professional investigation.
    • A structural survey carried out before purchase may have missed active movement — discovering a crack after moving in doesn’t necessarily mean the surveyor was negligent.
    • Building Regulations Part A governs structural stability in England and Wales; any remedial work affecting structure must comply.

    Why Cracks Appear After You Move In

    Moving into a property changes it in ways that are easy to underestimate. Central heating that was previously left on a low setting gets cranked up. Rooms that were empty are now full of furniture, books, and people. A house that sat quietly vacant for months suddenly has a completely different thermal and loading profile. All of this causes materials to expand, contract, and shift slightly — and cracks are often the visible result.

    The most common culprits are entirely benign. Plaster shrinks as it dries out after a period of high humidity. Timber joists and studwork lose moisture when heating is increased, causing hairline cracks at junctions between different materials. New plasterboard partitions frequently crack at the taped joints during their first heating season. These are cosmetic issues, not structural ones, and a decorator with a tube of flexible filler can sort them out.

    That said, some cracks do indicate something more serious. Subsidence, foundation movement, overloaded lintels, and failed structural elements can all produce cracking that demands proper investigation. The difficulty for a homeowner is knowing which category a particular crack falls into — and that’s exactly what this article is here to help you understand.

    How to Read a Crack: Size, Shape, and Location

    Before you panic or dismiss a crack entirely, take a few minutes to examine it carefully. These three characteristics tell you most of what you need to know at first glance.

    Width

    The Building Research Establishment’s classification system — widely used by structural engineers in the UK — categorises cracks from Category 0 (hairline, less than 0.1 mm) through to Category 5 (very severe, over 25 mm). As a rough guide, if you can’t fit a 10p coin into the crack, it’s unlikely to be immediately dangerous. Cracks wider than 5 mm should always be investigated by a professional.

    Shape and Direction

    Diagonal cracks running at roughly 45 degrees from the corners of window and door openings are a classic sign of differential settlement — where one part of the foundation has moved relative to another. Horizontal cracks in brick or blockwork can indicate lateral pressure on a wall, which is a more serious concern. Vertical cracks running straight up through mortar joints are often caused by thermal expansion and are generally less worrying, particularly if they appear at regular intervals.

    Location

    Cracks near structural openings — above doors, windows, or where a wall has been removed and an RSJ or lintel installed — deserve extra attention. These areas carry concentrated loads, and a failing lintel or inadequately sized beam will often announce itself through cracking in the surrounding masonry or plasterwork. Similarly, cracks that run from floor to ceiling in a straight line can suggest movement in a structural wall.

    Cracks That Need Immediate Attention

    Some crack patterns are urgent. If you notice any of the following, stop reading and call a structural engineer today rather than waiting to see how things develop.

    • Cracks wider than 5 mm that have appeared suddenly, or that you can see are actively widening.
    • Cracks accompanied by doors or windows that have jammed, stuck, or started binding in their frames — this suggests the opening is being distorted by movement.
    • Diagonal cracking at 45 degrees from multiple window and door corners simultaneously, particularly if it’s progressing upwards through the structure.
    • Any crack accompanied by a visible lean or bulge in an external wall.
    • Cracks in the ceiling directly below a bathroom, which could indicate a failed joist or water damage to structural timbers.
    • Horizontal cracking in a retaining wall or basement wall, which can signal dangerous lateral earth pressure.

    These scenarios can escalate quickly. Under Approved Document A of the Building Regulations, structural elements must be capable of safely carrying the loads imposed on them — if there’s any doubt about whether that condition is being met, professional assessment is not optional, it’s essential.

    What Your Pre-Purchase Survey May Have Missed

    One of the most frustrating situations I encounter is a homeowner who paid for a survey before purchase and is now wondering why the surveyor didn’t flag the crack they’ve just found. There are a few important points to understand here.

    A standard RICS HomeBuyer Report is a visual inspection carried out at a single point in time. The surveyor can only report on what is visible and accessible on the day they visit. If a crack was hidden behind furniture, covered by freshly applied filler and paint, or simply hadn’t appeared yet, it won’t be in the report. This isn’t necessarily negligence — it’s a limitation of the service.

    A full RICS Building Survey (Level 3) goes further and is more appropriate for older properties, those with visible defects, or homes that have been significantly altered. If you bought a Victorian terrace with a recently knocked-through ground floor and only commissioned a Level 2 report, the scope of that survey may not have been adequate for the property’s condition.

    If you genuinely believe the surveyor missed something that was clearly visible and should have been reported, you can raise a complaint through the RICS. But in many cases, the crack that appears after moving in is new movement triggered by the change in occupancy — not something that existed before completion.

    Monitoring Cracks Yourself Before Calling Anyone

    If a crack doesn’t fall into the urgent category above, a period of monitoring is a perfectly reasonable first step. This gives you useful evidence to share with a structural engineer and helps distinguish between active movement and an old, stable crack.

    The simplest method is to mark the ends of the crack with a pencil and note the date. Check it weekly for a month. If the crack extends beyond your pencil marks, it’s active. If it stays within them, it’s likely historic and stable.

    A more precise approach is to use a tell-tale — a small plastic gauge that bridges the crack and allows you to measure any change in width or displacement. These cost a few pounds from a builders’ merchant and are worth using if you want a clear record to show a professional.

    Photograph the crack in good light, ideally with a ruler or coin in frame for scale. Note whether it changes appearance after heavy rain, during cold weather, or after the heating has been running for several hours. These patterns can help a structural engineer identify the underlying cause much more quickly.

    What a Structural Engineer Will Do

    When I carry out a structural inspection for a homeowner who’s found a crack after moving in, my process is methodical. I look at the full context of the building — its age, construction type, any alterations that have been made, and the ground conditions where possible. I examine the crack itself, but I also look at the wider pattern of any cracking throughout the property, because individual cracks rarely tell the whole story.

    I’ll check whether any walls have been removed and whether the beam or lintel above the opening is appropriate for the load it’s carrying. I’ll look at padstones — the bearing plates that transfer load from a beam into the wall below — to check they’re correctly sized and positioned. I’ll examine the condition of any visible structural timbers, and I’ll look at the external walls for signs of bowing, leaning, or stepped cracking in the mortar joints.

    After the inspection, I produce a written report that clearly states what I’ve found, what I believe the cause to be, and what action — if any — I recommend. That might be “monitor and review in six months,” or it might be “commission a drainage survey immediately and prop this wall while we investigate.” The report gives you something concrete to act on, and something to show your mortgage lender, insurer, or solicitor if needed.

    When to Call a Structural Engineer

    If a crack is wider than 5 mm, is actively growing, is accompanied by sticking doors or windows, or sits near a structural opening such as a removed wall or chimney breast, you should call a structural engineer rather than a builder or general surveyor. The same applies if you’re planning any remedial work that involves the structure — under Building Regulations Part A, structural alterations require proper design and, in most cases, Building Control sign-off. A chartered structural engineer can assess the risk, specify the correct repair, and give you the professional assurance that the work has been done correctly.


    Need expert advice on this?

    I am a Chartered Structural Engineer (CEng, MIStructE) based in Huddersfield. The Beam Doctor offers two ways to get my expert input on your project:

  • Is BSR Approval Needed for Removing Non-Load Bearing Walls?

    Is BSR Approval Needed for Removing Non-Load Bearing Walls?

    You’re planning to remove a non-load bearing wall in your flat, and someone has mentioned the Building Safety Regulator — now you’re not sure whether you need formal approval before you pick up a sledgehammer. If your building is over seven storeys tall, the answer is almost certainly yes, and this article explains exactly why.

    Key Takeaways

    • The Building Safety Regulator (BSR) introduced a new higher-risk building regime under the Building Safety Act 2022, which applies to residential buildings over 18 metres or seven storeys tall.
    • Even removing a non-load bearing wall in a higher-risk building can trigger a mandatory approval process before work starts.
    • You’ll need to submit a Building Control application through the BSR — not your local authority — for any qualifying works in these buildings.
    • Confirming a wall is truly non-load bearing requires a structural engineer’s assessment, not a visual guess.
    • Proceeding without the correct approvals in a higher-risk building carries serious legal and financial consequences.

    What the Building Safety Act 2022 Changed

    Before 2022, Building Regulations approval for internal alterations in flats followed a relatively straightforward path. You’d notify your local Building Control body, they’d inspect the work, and you’d receive a completion certificate. For genuinely minor works — like removing a non-structural partition wall in a standard house — many homeowners didn’t even need to notify anyone at all.

    The Building Safety Act 2022 changed that picture significantly for people living in taller residential buildings. The Act created a new category called Higher-Risk Buildings (HRBs), and it established the Building Safety Regulator — a body sitting within the Health and Safety Executive — as the sole Building Control authority for those buildings. This wasn’t a tweak to the existing system. It was a wholesale replacement of how Building Control works for buildings that meet the height threshold.

    The legislation was a direct response to the Grenfell Tower disaster and the subsequent Hackitt Review, which found that the existing regulatory framework was inadequate for complex, multi-occupied residential buildings. The core principle is that residents in tall buildings deserve a higher level of scrutiny over any work that could affect the structure, fire safety, or overall safety case of their building.

    If your building is over 18 metres in height or has more than seven storeys, it almost certainly falls within this regime. That threshold applies to the building as a whole — not just the floor you live on.

    Does Removing a Non-Load Bearing Wall Count as Notifiable Work?

    This is the question most homeowners ask first, and the honest answer is: it depends on the building, the wall, and how the work is classified under the Building Regulations.

    Under the standard Building Regulations framework, removing a non-load bearing internal partition in a dwelling is often classed as exempt from Building Regulations notification. That exemption exists because, in theory, a non-structural wall doesn’t affect the structural integrity of the building. In a standard two-storey house, that logic is broadly sound.

    In a higher-risk building, the situation is more complex. The BSR regime requires the Principal Accountable Person (PAP) — usually the building owner or management company — to maintain a safety case for the entire building. Any work that could affect that safety case, including changes that touch fire compartmentation, structural elements, or building services, must go through the BSR’s Building Control process.

    Here’s the critical point: many internal walls in flats are not just partition walls. They may form part of the fire compartmentation strategy — the system of fire-resistant barriers that contains a fire within one flat and prevents it spreading to the rest of the building. A wall can be entirely non-load bearing from a structural standpoint and still be a fire compartment wall. Removing or altering it without approval could compromise the building’s fire strategy, which is a serious safety issue and a notifiable change under the HRB regime.

    So even if your engineer confirms the wall carries no structural load, you cannot assume the work is automatically exempt in a higher-risk building.

    How the BSR Approval Process Works

    For higher-risk buildings, Building Control applications do not go to your local council. They go directly to the Building Safety Regulator. The BSR has its own team of registered Building Inspectors, and the process follows a gateway model that’s more detailed than traditional Building Control.

    For works to an existing higher-risk building — which is what we’re talking about here — you’ll generally be working within what the BSR calls the occupation phase regime. The building’s Principal Accountable Person has ongoing duties to manage and update the safety case, and any changes to the building must be assessed against that safety case before they’re made.

    In practical terms, this means:

    • You’ll need to notify the PAP (your building owner or management company) before starting any work.
    • The PAP must assess whether the proposed change affects the building’s safety case.
    • If a Building Regulations application is required, it must be submitted to the BSR — not the local authority.
    • The BSR must approve the application before work begins. This is a key difference from some traditional Building Control routes, where you could start work and notify simultaneously.

    The timeframes involved are longer than standard Building Control. You should build significant lead time into your project programme if you’re in a higher-risk building.

    How to Confirm Whether Your Wall Is Load Bearing

    Before you can even begin the BSR process, you need to establish what type of wall you’re dealing with. This matters for two reasons: it affects what approvals you need, and it affects how the work is specified and carried out.

    A common misconception is that you can tell whether a wall is load bearing by looking at it. You can’t — not reliably. The direction of floor joists, the position of the wall relative to the structure above, and the building’s original construction method all influence whether a wall is structural. In a high-rise flat, the construction is often reinforced concrete frame, which means the walls between flats and rooms may be entirely non-structural infill panels — but you need an engineer to confirm that, not a guess based on wall thickness.

    A structural engineer will review the building’s structural drawings (if available), inspect the wall and the construction around it, and give you a written opinion on whether the wall is load bearing. That written opinion is something you’ll want to have on record when you approach your building management company and, if necessary, the BSR.

    It’s also worth noting that in a concrete frame building, what looks like a simple partition removal may involve cutting through screed, relocating services, or working near structural columns and beams. None of that is straightforward, and all of it needs proper assessment.

    Your Lease and the Building Management Company

    Even if you’ve confirmed the wall is non-load bearing and you’ve worked out what Building Regulations approvals are needed, there’s another layer to consider: your lease.

    Most residential leases in purpose-built flats contain clauses that restrict alterations to the property. Removing an internal wall — even a non-structural one — almost always requires written consent from your freeholder or management company before work starts. This is a separate requirement from Building Regulations and from the BSR. Failing to get it can put you in breach of your lease, which creates problems when you come to sell.

    In a higher-risk building, the management company is likely to be the Principal Accountable Person, so they’ll be involved in the process regardless. But approach them early, provide them with your structural engineer’s assessment, and get their consent in writing before any work begins.

    If your building has a residents’ management company or a managing agent, they should have a clear process for handling alteration requests. Ask for it in writing and keep records of everything.

    When to Call a Structural Engineer

    If your flat is in a building over seven storeys tall and you’re considering any internal alterations — even something that appears minor, like removing a partition wall — you should get a structural engineer involved before you do anything else. I’d say this even before you approach your management company, because having a professional assessment in hand makes every subsequent conversation more straightforward. An engineer can confirm whether the wall is structural, identify any fire compartmentation implications, advise on what approvals are likely to be needed, and produce the documentation that Building Control and your freeholder will expect to see. Trying to shortcut this process in a higher-risk building isn’t just risky — under the Building Safety Act 2022, it can carry real legal consequences for you as the leaseholder.


    Need expert advice on this?

    I am a Chartered Structural Engineer (CEng, MIStructE) based in Huddersfield. The Beam Doctor offers two ways to get my expert input on your project:

  • Essential Guide to RSJ Installation in 1950s London Homes

    Essential Guide to RSJ Installation in 1950s London Homes

    You’re planning to open up a ground floor in a 1950s London house and you want to know what’s actually involved in getting an RSJ installed safely and legally. It’s a very common project — and one where the details really do matter, particularly in post-war semi-detached and terraced properties that have their own structural quirks.

    Key Takeaways

    • 1950s London houses have specific structural characteristics that affect how an RSJ installation is designed and specified.
    • You’ll need a structural engineer’s calculations and Building Regulations approval before any load-bearing wall comes down.
    • Temporary propping is essential — removing support without Acrow Props in place can cause immediate and serious structural damage.
    • Padstones distribute the beam’s load into the masonry below; getting them right is as important as sizing the beam itself.
    • Party walls are common in 1950s London terraces — you may have obligations under the Party Wall Act 1996 before work begins.

    What Makes 1950s London Houses Different

    London’s post-war housing stock — built roughly between 1945 and 1965 — tends to follow fairly consistent patterns, but there are enough variations to catch out builders and homeowners who assume one house is much like another. Most of these properties are two-storey terraced or semi-detached houses with cavity brick walls, timber intermediate floors, and relatively modest foundations. The ground floor internal walls are often load-bearing, carrying the floor joists above and sometimes the roof structure beyond that.

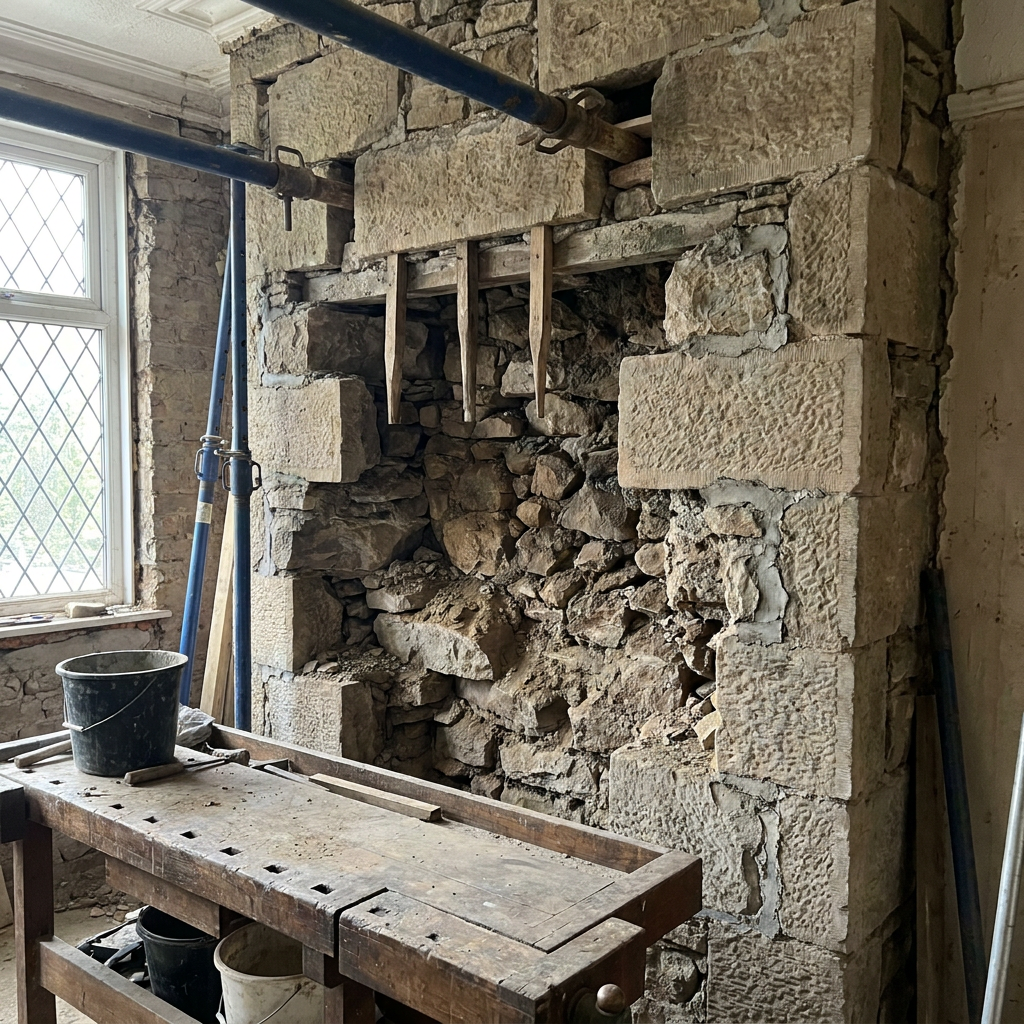
    One thing I see regularly in this era of property is the use of lightweight concrete blocks alongside traditional brick, particularly in internal partitions built during or just after construction. These blocks can look structural but sometimes aren’t — and vice versa. That ambiguity is exactly why a proper structural assessment matters before you commit to any wall removal.

    Another consideration is the condition of the existing masonry. Seventy-plus years of settlement, moisture movement, and the occasional bodged repair means the brickwork you’re bearing your new beam onto may not be in the condition it appears. I always check the state of the supporting piers and the wall below the proposed beam position before I sign off any calculations. Weak or spalled brickwork changes the padstone specification and sometimes the beam size itself.

    Do You Actually Need an RSJ?

    Not every wall removal in a 1950s London house requires a steel beam. Shorter spans — typically under about 1.8 m in a lightly loaded situation — can sometimes be handled with a reinforced concrete or timber lintel. But for the kind of open-plan kitchen-diner project that most homeowners are after, you’re usually looking at a span of 3 m or more, and at that point a steel universal beam (the RSJ) is almost always the right solution.

    The term RSJ is widely used in the trade and by homeowners, though strictly speaking it refers to a Rolled Steel Joist with a specific cross-section profile. Most modern installations use a Universal Beam (UB) section, which has a more efficient flange geometry. In practice, when a builder or homeowner says RSJ, they mean a steel beam — and that’s fine. What matters is that the correct section size is specified by a structural engineer based on the actual loads and span involved, not guesswork or what the last job used.

    I’ve seen beams that were too small deflecting visibly within months of installation, and beams that were wildly oversized because someone played it safe without doing the sums. Both outcomes are avoidable with a proper structural calculation. Building Regulations Part A requires that structural elements are adequate for the loads they carry, and Approved Document A sets out the principles that underpin compliance.

    The Structural Engineer’s Role — and Why You Need One

    In England, installing a steel beam in a load-bearing wall is notifiable work under Building Regulations. That means you need Building Control involvement — either through your local authority or an approved inspector. And Building Control will require structural calculations prepared by a competent person. In practice, that means a structural engineer.

    My job on a project like this is to assess the loads coming down through the structure above — dead loads from floors, walls, and roof; imposed loads from occupants and furniture — and calculate the bending moment and shear forces the beam must resist. From that I specify the steel section size, the bearing length at each end, and the padstone requirements. I also check whether the existing wall below the beam ends can take the concentrated point loads without needing strengthening.

    For a 1950s London terrace, I’ll also want to know whether the wall you’re removing is a party wall shared with the neighbour. If it is, the Party Wall Act 1996 is triggered, and you’ll need to serve notice before work starts. This is separate from Building Regulations — it’s a civil matter between you and your adjoining owner — but it’s one that catches a lot of homeowners off guard.

    Temporary Propping and the Installation Sequence

    This is the part of RSJ installation that I think deserves more attention in guides aimed at homeowners, because it’s where things go wrong when the work is rushed or poorly planned.

    Before any masonry is removed, the structure above must be temporarily supported using Acrow Props and spreader boards. The props transfer the load from the floor joists (or whatever is bearing on the wall) down to the ground floor slab or a suitable bearing point below. Get this wrong — use too few props, place them in the wrong position, or use inadequate spreader boards — and you risk cracking the structure above, or worse.

    The typical sequence for RSJ installation looks like this:

    • Temporary props installed on both sides of the wall, supporting the structure above.
    • The wall is carefully removed to create the opening, leaving the masonry in the bearing zones intact until the beam is ready to go in.
    • Padstones are bedded onto the supporting piers at each end.
    • The steel beam is lifted into position — often requiring a small team and sometimes a chain block or beam lifter for heavier sections.
    • The beam is packed tight to the structure above, the remaining masonry is made good, and the props are removed once the mortar has cured.

    This sequence should be agreed between your structural engineer and your builder before work starts. I always include a note on propping requirements in my structural specification so there’s no ambiguity on site.

    Padstones — The Detail That’s Often Overlooked

    A padstone is a block of dense concrete or engineering brick bedded into the masonry at each end of the beam. Its purpose is to spread the concentrated point load from the beam end over a larger area of brickwork, reducing the stress at that point to something the masonry can safely carry.

    The size of the padstone depends on the beam reaction (the load at each end), the bearing capacity of the masonry, and the geometry of the wall. I calculate the required padstone dimensions as part of my structural design. A common failure I see in work done without proper engineering input is either no padstone at all — just the beam sitting directly on a few courses of standard brick — or a padstone that’s the right material but the wrong size.

    In 1950s brickwork, the mortar is often a lime-based mix that’s softer than modern cement mortars. That affects the bearing capacity of the masonry, and it’s one of the reasons I don’t apply generic rules of thumb to older properties. Each job gets its own calculation.

    Building Control Sign-Off and Completion Certificates

    Once the beam is in and the work is complete, Building Control will inspect the installation and, if satisfied, issue a completion certificate. This document is important — you’ll need it when you come to sell the property. Solicitors and buyers’ surveyors routinely ask for evidence that structural alterations were carried out with Building Regulations approval, and an absence of paperwork can delay or derail a sale.

    If you’re buying a 1950s London house that has already had walls removed and beams installed, it’s worth checking whether there’s a completion certificate on file. If there isn’t, an indemnity insurance policy is sometimes used to resolve the issue, but it’s not a substitute for knowing the work was done properly. A structural survey can give you confidence about the condition and adequacy of the existing installation even where paperwork is missing.

    The process of getting Building Control approval is straightforward when you have a structural engineer involved from the start. I submit calculations and drawings to Building Control as part of the design process, so by the time work starts on site, the inspector already knows what to expect.

    When to Call a Structural Engineer

    If you’re planning to remove any wall in a 1950s London house — even one you think might be non-load-bearing — you should get a structural engineer involved before work starts. The cost of a structural assessment is small relative to the cost of rectifying damage caused by removing a wall that was doing more than it appeared. Beyond wall removal, you should also call a structural engineer if you’re buying a 1950s property and want confidence that previous alterations were carried out correctly, or if you’ve noticed cracking, deflection, or other signs that the structure may not be performing as it should.


    Need expert advice on this?

    I’m Paul, a Chartered Structural Engineer (CEng, MIStructE) based in Huddersfield. The Beam Doctor offers two ways to get my expert input on your project:

  • The Essential Guide To House Extensions: Costs And Regulations

    The Essential Guide To House Extensions: Costs And Regulations

    House extensions significantly increase living space and property value. They demand careful planning to ensure safety and legal compliance. I prioritize detailed structural calculations, particularly in relation to Building Regulations Part A, as essential for reducing risks associated with foundations, load-bearing elements, and overall structural integrity.

    Key Takeaways

    • Structural Calculations are Crucial: Detailed structural calculations, signed by a qualified engineer, are mandatory for all extensions, covering foundations, beams, lintels, and masonry panels to ensure structural safety and compliance.
    • Building Regulations Part A Compliance: Adherence to Building Regulations Approved Document A is paramount for a safe and structurally sound extension, enforced through inspections at every stage.
    • Professional Fees are Essential: Budget for professional fees, including architectural services, structural engineering, and Building Control applications, as these are crucial for a compliant and safe build.
    • Party Wall Act Awareness: Understanding and adhering to the Party Wall etc. Act 1996 is vital, requiring proper notice to affected neighbors to avoid disputes and legal issues.
    • Foundation Considerations: Choosing the right foundation type (strip, trench-fill, raft, or piled) is essential based on site conditions to prevent settlement and maintain structural stability.

    Overall Project Costs

    I target projects that range from £1,800 to £5,000+ per square metre, depending on your specification. Basic builds with shell-only or DIY finishes average £1,800 to £2,500 per square metre. Standard options featuring good-quality typical finishes hit £2,500 to £3,500 per square metre. High-spec extensions using premium materials, complex designs, and bespoke elements push costs to £3,500 or more. Remember, these figures exclude VAT. You’ll add 20% on most materials and labour to the total.

    Professional fees add up quickly and prove essential. Structural engineering charges run £1,500 to £4,500 for detailed structural calculations covering foundations, floor joists, roof timbers, steel beams like RSJs or Universal Beams (UBs), lintels, and masonry panels. These include stamped and signed structural drawings, ensuring compliance with Building Regulations Part A for safe house extensions. Architectural services include an initial consultation and survey at £500 to £1,500, planning application drawings at £1,500 to £4,000, and Building Regulations drawings and specifications at £1,500 to £4,000. Building Control applications cost £400 to £1,200 for plan checks and site inspections. In England, planning permission fees sit at £206 for householder applications.

    Party Wall Surveyor fees apply per adjoining owner if the Party Wall etc. Act 1996 comes into play, ranging from £750 to £2,500—you often cover your neighbour’s surveyor too. For complex sites with clay or large extensions, a Ground Investigation Report (geotechnical survey) at £800 to £2,500 helps avoid surprises. As Pauk Kangunga, a Chartered Engineer with MIStructE, I recommend prioritizing these to prevent costly errors.

    Construction Cost Breakdown

    I allocate percentages like this to guide budgets:

    • Foundations and groundworks take 10-15%.
    • Walls consume 20-25%.
    • Roof structure and covering account for 10-15%.
    • Windows and doors use 10-15%.
    • First fix runs 10%.
    • Second fix and finishes reach 15-20%.
    • A contingency of 10-15% covers issues such as ground conditions or material price hikes. I stress structural calculations here to maintain safety and Building Regulations Part A alignment.

    Critical Structural Components and Building Regulations Part A Compliance

    I define a house extension as a new structure attached to an existing residential property, primarily to boost habitable space. It demands seamless integration with the original building’s fabric and foundations to prevent issues down the line. Common varieties include single-storey rear extensions that expand kitchen or living areas, side extensions for utility rooms or wider living spaces, wrap-around designs merging both sides and rear, and two-storey options adding bedrooms or bathrooms. Each type tests the building’s core elements differently.

    Foundations form the vital link between your extension and the ground, bearing all loads. I recommend strip foundations for most straightforward sites. Trench-fill foundations suit stable conditions, while raft designs spread loads over weak or clay soils. For highly variable ground, piled foundations provide deep support. Choosing the right base prevents settlement and keeps everything level.

    The superstructure builds on these, consisting of walls and roofs. Walls often use masonry like brick or block, though timber or steel frames offer alternatives for speed. Roofs can be pitched with tiles or slates, or flat with felt, EPDM, or GRP coverings. Structural openings for doors or windows require solid elements like universal beams (not just RSJs) or concrete lintels to carry loads safely. I insist on including these to avoid collapses.

    Floor slabs vary too. Ground-bearing concrete slabs work well on firm sites, whereas suspended timber or concrete floors bridge over voids. The key lies in integrating the new with the old to handle differential settlement, maintain thermal efficiency, and ensure weather resistance. This interface demands extra care, as it’s prone to leaks and shifts.

    Compliance with Building Regulations Approved Document A takes priority for safety. I always push for detailed structural calculations covering foundations, floor joists, roof timbers, beams, lintels, and masonry panels. These must receive a stamp and signature from a Chartered Structural Engineer, such as those with MIStructE or FStructE credentials. Local Authority Building Control or an Approved Inspector enforces this, with mandatory inspections at every stage.

    I worked with a client who ignored these elements, leading to costly fixes. Learn from that—prioritize calculations and approvals to build securely. As structural engineer Paul Kangunga details on his author page, thorough planning saves headaches later.

    Key Integration Steps

    To merge the extension smoothly, start by matching foundations to existing ones. Seal joints against moisture and install expansion joints where needed. Test for structural compatibility by calculating load transfers. Here are the essentials:

    • Assess ground conditions first, ensuring the extension’s base matches or improves upon the house’s stability.
    • Use compatible materials, like matching wall types to avoid thermal bridging.
    • Reinforce the interface with flashings and damp-proof courses for long-term performance.
    • Verify all work meets Approved Document A’s standards before pouring concrete or erecting frames.

    Structural Integrity Risks That Could Destroy Your Investment

    I always stress that proper structural calculations keep your house extension safe and compliant with Building Regulations Part A. Skimping here invites costly failures that turn a dream project into a nightmare. Let’s dive into the major risks and how to sidestep them.

    Foundation and Settlement Issues

    Differential settlement occurs when new foundations sink differently than the old ones, causing diagonal cracks at the join. This leads to water leaks and unstable walls. Subsidence strikes when foundations don’t suit the soil, like on shrinkable clay or areas with high water tables. Heave can push up the ground, warping your extension. I recommend geotechnical surveys early to assess site conditions, then design foundations that distribute loads evenly.

    Loading and Structural Weaknesses

    Overloading hits when you tie new roofs or floors into existing structures without support, crushing walls or sagging floors. Incorrect beam sizing means undersized RSJs or timber lintels buckle under weight, creating bouncy floors and plaster cracks. Point load failures happen when heavy RSJs bear on small masonry spots without padstones to spread the force, shattering brickwork. Lack of lateral restraint leaves new walls wobbly in strong winds.

    Always use temporary props like Acrow props and strongboys during work, replacing them with permanent steel like RSJs and padstones. I calculate loads precisely to match Building Regulations Part A, ensuring every beam and wall withstands expected forces.

    Poor waterproofing at joins allows water in, fostering decay and mould. Construction hazards lurk too, from trench collapses during digs to asbestos exposure in old buildings. Hire certified surveyors for asbestos checks and follow safe excavation protocols. These oversights waste money on repairs, but proactive planning saves thousands.

    Navigating Planning Permission and Permitted Development Rights

    I prioritize verifying whether your house extension qualifies under permitted development rights before starting work. These rights often let you build small additions without seeking full planning permission, saving time and money. Always double-check specifics with local authorities to avoid mistakes. If your plans fit within these rights, I recommend securing a Lawful Development Certificate to protect your project legally. This certificate confirms that the extension complies fully. Expect to pay a £206 householder planning application fee in England, as that covers basic submission costs.

    Violations draw serious consequences. Folks who overstep permitted development rights without proper permission face enforcement notices from councils. These can demand changes to your extension or its complete demolition. Plus, you’ll incur hefty legal expenses or fines. I insist you never begin construction until you have confirmed permitted development rights or obtained full planning permission.

    Tie this to structural integrity by calculating loads and ensuring Building Regulations Part A compliance. I design extensions that meet these rules for safety, preventing issues that could complicate planning stages. For more insights on compliant builds, visit the work of author Paul Kangunga. Reference the UK Government Planning Portal: ‘Permitted development rights for householders – Technical guidance’ to guide your checks. Plan your extension steps carefully. I focus on precise load-bearing assessments right from the start, maintaining alignment with Building Regulations Part A to guarantee structural safety. This approach reduces risks tied to unsteady builds.

    Conduct surveys early. I recommend hiring professionals for site inspections, highlighting potential issues like soil conditions or existing foundations.

    Essential Load-Bearing Elements

    Incorporate accurate calculations for key components. This list outlines critical aspects to review, blending technical needs with everyday advice:

    • Walls: Verify load transfers from extension to house using precise engineering formulas.
    • Foundations: Choose appropriate depth and materials based on soil type and building weight.
    • Beams: Select sizes that handle bending moments and shear forces effectively.

    Understanding the Party Wall etc. Act 1996 and Your Legal Obligations

    I stress the importance of structural calculations and compliance with Building Regulations Part A for safe house extensions. These foundations ensure that your project avoids collapse risks and meets safety standards. Now, let’s dive into the Party Wall etc. Act 1996, which governs works on or near shared boundaries. This legislation kicks in whenever you build close to a neighbor’s property line. I always advise checking if your extension affects an adjoining owner before you break ground.

    Servicing valid Party Wall Notices is a key step. You send these to every neighbor affected, giving them at least two months’ warning. Delay or mishandle this, and you invite conflicts. Disputes can lead to injunctions that stop your work cold. Plus, you may foot the bill for any damages or legal fees your neighbors rack up. I handle this by reviewing site plans early to avoid such pitfalls.

    Party Wall Surveyors and Awards

    Costs for Party Wall Surveyors range from £750 to £2,500 per adjoining owner to draft an Award. You often cover your neighbor’s fees as well, doubling expenses. The Award outlines work details and protects both sides. Agree on this before starting—it’s essential. Non-compliance spells trouble; it halts projects and triggers costly legal fights.

    I recommend hiring a qualified surveyor right away. They interpret the Act and prevent errors. As Paul Kangunga at the Beam Doctor advises, get experts involved early. This secures your extension without boundary issues.

    Why Notices Matter

    Properly served Party Wall Notices are non-negotiable if your plans impact boundaries. Build without them, and regulators may intervene. Ensure notices detail the work accurately. Update them if plans change. This transparency fosters good relations and shields you from claims. Reference the full details on Legislation.gov.uk under ‘Party Wall etc. Act 1996’. I always prioritize this to keep extensions on track and structurally sound. Stay alert to boundary rules. They protect your investment and maintain neighbor harmony.

    The Non-Negotiables: Building Regulations Compliance and What Happens If You Skip It

    Building Regulations compliance lies at the heart of safe house extensions, with Approved Document A (Structure) standing as the cornerstone for ensuring the building holds up under load. I prioritize these rules because they prevent catastrophic failures that could ruin your home and your finances. Let’s delve into what you must adhere to, with a focus on structural calculations and Building Regulations Part A.

    I recommend starting every extension project by securing comprehensive Building Regulations drawings and calculations stamped and signed by a Chartered Structural Engineer, ideally holding MIStructE or FStructE qualifications. These professionals assess load-bearing elements like beams, foundations, and walls to guarantee safety. Without this, you risk instability that compromises the entire property. Formal approval from your Local Authority Building Control or an Approved Inspector comes next—don’t begin work without it.

    Beyond structural integrity, several other Approved Documents demand attention. Here’s an overview:

    Key Approved Documents for Extensions

    • Approved Document B (Fire Safety) requires adequate fire separation and escape routes to protect occupants.
    • Approved Document L (Conservation of Fuel and Power) mandates insulation and energy-efficient measures to reduce heat loss.
    • Approved Document F (Ventilation) ensures fresh air provision for healthier indoor environments.
    • Approved Document H (Drainage and Waste Disposal) covers correct foul and surface water drainage to avoid flooding risks.

    Factor in the mandatory Building Control application fees, ranging from £400 to £1,200 depending on your extension’s floor area, as outlined by the Ministry of Housing, Communities & Local Government (MHCLG) in ‘The Building Regulations 2010 Approved Documents (A, B, F, H, L)’. These fees fund the oversight that keeps projects safe, so view them as an investment in peace of mind.

    You must adhere to the Building Control inspection schedule throughout the build process. Inspectors check progress at key stages, verifying compliance and catching issues early. Ignoring this invites delays and rework that balloons costs.

    Consequences abound if you skip compliance. Expect ‘stop work’ notices that halt construction, refusal of a Completion Certificate—which complicates selling or remortgaging—and potential legal action from authorities. The Institution of Structural Engineers (IStructE) in ‘The Structural Engineer’s Role in Residential Property’ highlights how non-compliant extensions lead to devaluation and repair expenses. Employ only reputable, insured builders and avoid cutting corners on professional fees; skimping here often results in ruinous legal battles down the line.

    Your home deserves the assurance of qualified experts. As Paul Kangunga structural engineer explains, shortcuts endanger lives and livelihoods. Prioritize compliance to build extensions that last and appreciate in value. The Royal Institution of Chartered Surveyors (RICS) in ‘RICS Building Cost Information Service (BCIS)’ supports budgeting for these essentials upfront, preventing costly regrets later. Always consult the MHCLG guidelines for the latest requirements, as they directly affect your project’s feasibility and safety. This approach lets me confidently advise clients on extensions that meet high standards without unnecessary risks.

    Sources:
    UK Government Planning Portal: “Permitted development rights for householders – Technical guidance”
    Ministry of Housing, Communities & Local Government (MHCLG): “The Building Regulations 2010 Approved Documents (A, B, F, H, L)”
    Legislation.gov.uk: “Party Wall etc. Act 1996”
    Institution of Structural Engineers (IStructE): “The Structural Engineer’s Role in Residential Property”
    Royal Institution of Chartered Surveyors (RICS): “RICS Building Cost Information Service (BCIS)”

  • Essential Guide To House Extensions: Costs, Design & Regulations

    Essential Guide To House Extensions: Costs, Design & Regulations

    Planning a house extension demands careful consideration beyond aesthetics—structural integrity and adherence to regulations remain paramount. Prioritizing professional structural calculations and strict compliance with Building Regulations Part A ensures a safe and well-supported renovation, preventing potential failures and costly rework.

    Key Takeaways

    • Structural calculations remain non-negotiable, serving as the first line of defense against potential disasters during a house extension.
    • New foundations, walls, beams, and roofs require precise integration and load transfer, demanding careful planning and professional expertise.
    • Compliance with Building Regulations Part A is legally required and essential for safety, habitability, and maintaining property value.
    • Addressing potential risks like inadequate foundations, undersized beams, and connection failures proactively can prevent costly overruns and ensure structural integrity.
    • Allocate a contingency fund (10-15%) for addressing unforeseen issues like ground conditions, asbestos, or design changes during the project.

    Why Professional Structural Engineering Is Non-Negotiable for Your House Extension

    I always emphasize the critical role of structural calculations and compliance with Building Regulations Part A during house extensions. These steps ensure safety and proper support amidst renovations. Extensions alter the building’s core, so I advise against shortcuts that ignore these rules.

    Core Structural Elements in House Extensions

    You must address new foundations, walls, columns, beams, and roofs to make your home functional. These changes affect the existing structure, demanding precise integration. I recommend new foundations that transfer loads safely to the ground, considering soil type and compatibility with current materials.

    Additionally, openings in walls need lintels or RSJs. Roofs require secure connections to prevent shifts. Temporary supports protect the site during work. This work qualifies as a material change, requiring full compliance with UK Building Regulations.

    To illustrate, I suggest focusing on these structural needs upfront:

    • New foundations support added weight without cracking.
    • Walls and columns distribute loads evenly across the extension.
    • Beams and roofs connect securely, maintaining integrity.

    I ensure your extension becomes habitable space by securing Full Plans approval from Building Control. This approval demands design and calculations by a Chartered Structural Engineer, certified like MIStructE or MICE.

    Investing in this expertise prevents disasters. Structural failures cause financial loss and risks lives. I draw from my experience to urge professional input. Skip it, and you invite collapse or penalties.

    For deeper insights, I share knowledge as a chartered structural engineer on safe extensions. This approach saves costs long-term.

    Critical Structural Risks That Can Destroy Your Extension Project

    Structural calculations serve as your first line of defense against disaster during a house extension. I always stress verifying them against Building Regulations Part A to maintain safety and prevent costly mistakes. Skipping this step invites issues that turn minor renovations into major headaches.

    One key risk involves inadequate foundations, where ignoring soil conditions like clay shrinkage or swelling causes differential settlement. Foundations that fail to reach the required depth of at least 750mm invite frost heave and outright collapse. Expect masonry cracking, uneven floors, or worse during winter months.

    Undersized beams or lintels create another pitfall. An undersized RSJ for a new opening in an existing wall leads to excessive sagging and plaster damage over time. Doors jam and windows stick as the beam deflects too much. This isn’t a setback you fix easily; it demands immediate reinforcement to avoid bearing failure on the masonry. I recommend sizing these elements based on precise load calculations right from the start. Poor load transfer compounds problems by placing new columns directly onto floor slabs without pad foundations. Such point load failures erode your property’s integrity quickly.

    Essential Connections and Supports

    Connections between old and new structures need careful attention to prevent instability. Loose wall ties or improperly joined roof timbers allow water intrusion and differential movement, leading to damp issues and weakened supports. Temporary supports during construction demand professionalism too. Faulty Acrow props or strongboys collapse if not installed correctly, endangering lives and halting progress. These failures, though common without expert guidance, stem from cutting corners on regulations. Always include insulation details in your plans to align with Part A standards, as overlooked thermal bridging worsens damp and boosts energy costs.

    Cost overruns soar when structural flaws force rebuilds. I advocate thorough design reviews to sidestep these traps. For deeper expertise on preventing these issues, check insights from structural engineers like Paul Kangunga, who outlines practical solutions for safe extensions. Structural failure doesn’t discriminate; proactive planning ensures your project thrives instead of falters. Calculate loads accurately, inspect soils thoroughly, and partner with qualified pros to uphold safety. Enjoy the process as your home expands securely.

    Building Regulations Part A and Legal Compliance Requirements You Cannot Ignore

    It’s essential to understand the importance of structural calculations and compliance with Building Regulations Part A when planning house extensions. These regulations ensure safety and provide proper support during renovations, preventing collapses and avoiding costly rework.

    Key Building Control and Planning Essentials

    Skipping Building Control Approval can have severe consequences. It’s illegal, voids insurance, complicates property sales, and invites enforcement actions such as demolition. Approved Document A requires that structural design prioritizes safety. Additionally, ignoring Planning Permission beyond Permitted Development Rights (PDR) can lead to notices requiring changes or even demolition.

    PDR limits single-storey rear extensions to a 4-meter depth for detached houses and 3 meters for semi-detached or terraced houses, with restrictions on heights and curtilage coverage percentages.

    Avoiding Party Wall Disputes and Performance Pitfalls

    Failing to comply with the Party Wall Act 1996 can result in legal disputes. It’s crucial to serve proper notices via qualified surveyors before excavating near neighboring structures—within 3 meters of their foundations or 6 meters considering the angle of repose, or when building on boundaries. As Paul Kangunga advises regarding structural integrity, handling all party wall issues with precision is key.

    Bypassing Approved Documents can lead to significant problems. Non-compliance with Document L can increase energy bills due to poor insulation. Overlooking Document C can result in damp issues. Neglecting Document B compromises fire safety, putting lives at risk. I always recommend verifying these documents to maintain property value and ensure habitability.

    Real-World House Extension Costs for 2025

    I focus on realistic pricing when budgeting for house extensions. Costs fluctuate widely due to factors like location, project complexity, material selections, and finish quality. In London, expect higher expenses compared to regional areas. Emphasize structural calculations and compliance with Building Regulations Part A during planning to guarantee safety and support.

    Build costs per square meter exclude VAT, professional fees, and fittings. For a basic single-storey extension, I calculate £2,000 to £3,000 per m². A good quality version climbs to £3,000 to £4,000 per m². Double-storey extensions follow similar patterns. Basic ones run £1,800 to £2,800 per m² for the total footprint. Opt for good quality, and prices rise to £2,800 to £3,800 per m².

    Consider a practical example. A 4m x 5m kitchen extension spans 20 square meters. Build costs could total £40,000 to £80,000 plus VAT. Always distinguish build costs, covering materials and labor, from separate professional fees for architects or engineers.

    Material costs drive much of the variation. Inflation hits timber, steel, and insulation hard. Labour costs also surge due to shortages in skilled trades. Forecast these rises when planning. I recommend factoring in 10-20% buffers for unexpected price jumps.

    Key Cost Components

    I break down essential elements that impact totals. Review these to align with your extension goals.

    • Basic extensions use standard materials and straightforward designs, keeping builds efficient.
    • Good quality versions incorporate premium finishes, improving durability and aesthetics.
    • Location matters; urban sites incur higher transportation and permit fees.
    • Material inflation and labour shortages push prices upward quarterly.

    Incorporate structural engineering advice to manage these variables. I stress verifying Building Regulations Part A adherence for every extension to avoid costly rework.

    Professional Fees Breakdown: What You Actually Need to Budget

    I emphasize structural calculations and compliance with Building Regulations Part A when planning house extensions. These ensure safety and proper support during renovations. Preparing your budget for professional fees involves understanding costs for key experts. These fees vary based on project size and location. I advise allocating funds upfront to prevent over-runs later.

    Core Professional Fees

    Start with an architect or designer if your extension requires detailed planning. Their fees typically range from 7-15% of the total build cost. For smaller projects, expect a fixed fee around £2,500. Larger, complex designs, like double-storey extensions, can reach £15,000 or more. This covers concept sketches, planning application documents, and construction blueprints. Engage a structural engineer early to handle load-bearing designs. They calculate everything from foundation details to steel beams and roof connections. Fees often fall between £1,000 and £3,500, with extras for site checks or complex features like basements. Remember, costs rise with complication. A £1,500 investment here prevents major failures that could cost far more to fix. Building Control charges for application reviews and inspections run from £600 to £1,800, depending on extension scale and local rules. Their oversight confirms adherence to safety standards.

    Additional and Contingency Fees

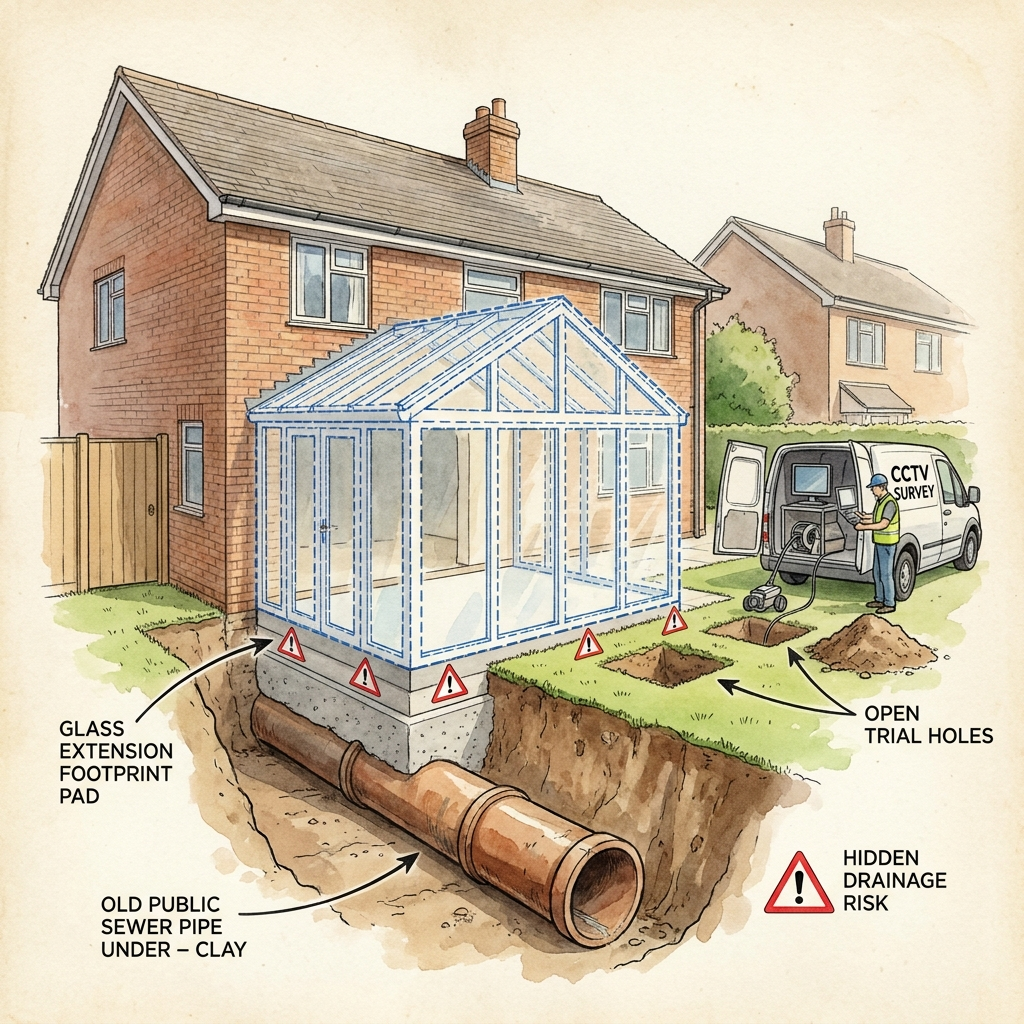
    Include party wall surveys if adjoining properties impact your plans. Under the Party Wall Act 1996, fees per neighbour range from £1,500 to £4,000. Disputes or multiple neighbors drive costs higher. Prepare for other potential expenses too. Topographical surveys cost £500-£1,500 to map land and levels. CCTV drain checks add £200-400 for underground assessments. Specialist reports may cover trees, wildlife, or heritage, varying by need. High-quality design and engineering at the start save money and reduce stress. For more on structural engineering, I often refer newcomers to Paul Kangunga’s articles on beam design.

    Set aside a contingency for unforeseen issues. Direct consultations with professionals yield accurate quotes tailored to your extension. Always verify their credentials, such as MIStructE or MICE for engineers, before committing. This approach keeps your project on track and compliant.

    Protecting Your Budget: Contingency Planning and Hidden Cost Triggers

    I always recommend setting aside a contingency fund of 10-15% of the total project cost to cover unforeseen issues during house extensions. This allocation prepares you for surprises like poor ground conditions, services diversions, or unexpected structural elements in the existing building. Careful planning here ensures you handle challenges without derailing your finances.

    Prioritize structural calculations early to spot potential problems, and ensure all work complies with Building Regulations Part A for robust support. I conduct thorough audits of your property to identify risks such as inadequate initial designs that could lead to redesigns or abortive builds.

    Common Triggers for Cost Overruns

    While unforeseen ground conditions might necessitate deeper foundations, other factors can escalate expenses rapidly. Discover hidden costs by reviewing a full property survey before starting. Here are key triggers that often cause overruns:

    • Unforeseen ground conditions requiring expensive piling or underpinning solutions.
    • Discovering asbestos in the existing structure, which demands specialized removal and increases safety costs.
    • Inadequate initial design leading to frequent changes, wasted materials, and extra labor.
    • Supply chain disruptions for key materials like timber or concrete, prolonging timelines and inflating prices.

    I advise consulting experts like Paul Kangunga to pinpoint these issues early. Maintain open communication with your team to identify shifts promptly. Address structural integrity first to stay aligned with regulations and avoid costly fixes later. Allocate contingency strategically across phases for better control. Monitor progress closely and adjust as needed. This approach minimizes disruptions and keeps your extension on track.

    Sources:
    Institution of Structural Engineers (IStructE) – Structural Engineering of Low-Rise Buildings
    Royal Institute of British Architects (RIBA) – Homeowner’s Guide to Working with an Architect
    GOV.UK – The Building Regulations 2010: Approved Documents (specifically Approved Document A – Structure, Approved Document L – Conservation of Fuel and Power, Approved Document B – Fire Safety, Approved Document C – Site Preparation and Resistance to Contaminants and Moisture, Approved Document M – Access to and Use of Buildings)
    GOV.UK – Planning Portal: Permitted Development Rights for Householders
    GOV.UK – The Party Wall etc. Act 1996: Explanatory Booklet
    Royal Institution of Chartered Surveyors (RICS) – Party Wall Legislation and Procedure Guidance Note

  • Rebuild Britain Vs Local Planning: What Changes For Single‑storey Rear Extensions?

    Rebuild Britain Vs Local Planning: What Changes For Single‑storey Rear Extensions?

    Reforms to the National Planning Policy Framework have brought more convenience to homeowners by simplifying the approval process for single-storey rear extensions—such as kitchen-diners and bi-fold door installations. However, it’s crucial to understand that although planning permissions are more accessible, they do not eliminate the requirement to comply with essential Building Regulations.

    Compliance with Building Regulations Remains Essential

    While the route to planning approval may be quicker under updated guidelines, homeowners must still ensure that any extension—no matter how minor—meets the requirements of Building Regulations, particularly Part A, which governs structural safety and stability.

    Key Areas to Focus On

    • Permitted Development Rights (PDRs): These simplified planning policies allow certain works without needing full planning permission, but they only address planning—not construction integrity.
    • Part A of Building Regulations: This part is concerned with the structural strength of buildings, especially when making alterations such as removing or modifying load-bearing walls.
    • Use of Qualified Professionals: Employing a structural engineer ensures proper load calculations and beam sizing for features like knock-throughs and rear extensions.
    • Size Limits and Structural Impact: Even if your extension fits the permitted size (up to 4 meters for detached homes, 3 meters for others), you’ll still need comprehensive structural assessments.
    • Budget for Safety: Including costs for professional services—such as structural engineering and Building Control approvals—is critical to a safe and regulation-compliant project.

    Why Structural Design Cannot Be Overlooked

    Features like expansive kitchen-diners and bi-fold doors impact the load distribution in a house. To ensure long-term structural success and to avoid costly failures, homeowners must work with skilled professionals and adhere strictly to structural guidelines mandated by Building Regulations.

    For detailed guidance on Permitted Development Rights and what is included, refer to the official technical guidance on PDRs.

    The Critical Misconception: Permitted Development Does NOT Mean You Can Skip Structural Safety

    National reforms such as those introduced in the National Planning Policy Framework have relaxed planning rules, enabling certain home improvements—like single-storey rear extensions—to be approved more swiftly under Permitted Development Rights (PDRs). Projects like rear kitchen-diners and installing bi-fold doors now require less bureaucracy when fitting within prescribed limits.

    However, these relaxed permissions under PDRs do not exempt homeowners from adhering to Building Regulations. Structural elements—especially knock-throughs involving load-bearing walls—still require precise engineering to ensure the safety and integrity of the home.

    Homeowners commonly mistake PDRs as a green light to bypass professional oversight. This misunderstanding introduces serious risks. It’s essential to recognize that PDRs apply solely to planning approval. They do not negate Building Regulations, which are in place to uphold structural safety.

    As an example, Schedule 2, Part 1, Class A of The Town and Country Planning (General Permitted Development) (England) Order 2015 (as amended) permits:

    • Single-storey rear extensions up to 4 metres deep for detached houses
    • Up to 3 metres deep for semi-detached or terraced houses
    • Max height of 4 metres, reduced to 3 metres at the eaves when within 2 metres of a boundary
    • Use of materials that match the existing house
    • Placement at the rear elevation

    Even larger extensions made permissible temporarily (up to 8 metres for detached or 6 metres for others) still imposed the same structural obligations. Homeowners must not mistake size exemptions as safety exemptions. Constructing rear kitchen-diners or adding expansive glass doors without proper engineering places the property at risk of structural collapse.

    According to Approved Document A – Structure, all structural changes must demonstrate compliance. Only qualified structural engineers can properly design the necessary beams and supports to manage new load paths created during alterations.

    Essential Criteria and Fees for Permitted Extensions

    A rear extension qualifies under PDR if it:

    1. Stays within the 4-metre depth for detached homes (or 3 metres for others)
    2. Uses materials similar to those of the existing building
    3. Is positioned strictly at the rear elevation

    Even for extensions that comply with PDR criteria, structural safety assessments remain critical. I recommend hiring a structural engineer early in the design stage. Their expertise ensures that load-bearing elements are adequately supported when creating openings for features like bi-fold doors or open-plan spaces.

    Building Control fees, typically ranging from £500 to £1,000, cover plan assessments and site inspections. These fees support the review of construction safety, reinforcing the importance of professional compliance even when planning laws are relaxed.

    In summary, national reforms simplify the planning process but do not affect safety regulations. Prioritize structural design to ensure your extension stands the test of time and avoids costly repairs.

    https://www.youtube.com/watch?v=Q6fAAJkXTng

    Why RSJs, Padstones and Structural Calculations Are Mandatory for Your Rear Kitchen-Diner Opening

    I often encounter rear kitchen-diner openings that involve large-scale changes like installing bi-fold doors or removing entire walls. These modifications demand structural integrity, so elements such as RSJs, padstones, and professional calculations become non-negotiable. Let’s break down why each component plays a vital role in ensuring your project succeeds without endangering the home or the people inside it.

    RSJs, or rolled steel joists, provide the backbone for supporting loads above large openings. Timber or pre-stressed concrete lintels serve similar purposes. I always recommend specifying the right size because undersized beams deflect over time, causing noticeable cracks or even catastrophic failure if unchecked. Proper sizing prevents these issues, but only a detailed calculation confirms the best choice. Timber options offer flexibility for lighter loads, while RSJs excel in heavy-duty scenarios, often costing between £300 and £800 for a 3m span.

    Essential Support Systems for Structural Stability

    Padstones distribute concentrated loads from beams into the masonry walls. Without them, or if you install incorrectly sized ones, the walls crush or crack under pressure. Each padstone typically ranges from £50 to £150, a small investment that averts major headaches. I ensure my projects include padstones with suitable supports at beam ends, matching the masonry strength to avoid failure points.

    Failing to prop the structure temporarily during construction adds huge risks. Inadequate Acrow props can collapse, creating immediate danger. I supervise propping to keep everything secure until the permanent supports take over.

    The Role of Professional Expertise

    A Chartered Structural Engineer from institutions like MIStructE or FStructE offers expertise here. They produce calculated and signed designs covering foundations, beams, roofs, and more, all aligned with Building Control standards. Fees run from £800 to £2,500 plus VAT, varying by project scope. Skipping this step means relying on guesswork, which invites structural failure and costly repairs. I prioritize these engineers to deliver safe, compliant results every time.

    These requirements hold even as national reforms ease planning for rear extensions. Building Regulations Part A enforce them, guaranteeing your home withstands everyday demands and external pressures.

    Foundation Design and Ground Conditions: The Hidden Risks That Will Crack Your Extension and Your Original House

    I examine how national reforms to the National Planning Policy Framework and permitted development align with local plans, revealing implications for rear kitchen-diners, bi-folds, and structural knock-throughs. Even as planning rules loosen, Building Regulations Part A demands careful attention. Effective beam design remains crucial to avoid catastrophic failures.

    New single-storey rear extensions require solid foundations like strip or trench-fill types made from reinforced concrete to spread loads evenly. These support the structure without causing undue stress on the ground. Ignoring poor soil conditions leads to serious issues. Where the soil proves inadequate, pile foundations often become necessary. This prevents the extension from sinking unevenly.

    Incorrect foundation design triggers differential settlement, particularly when the new foundations fall within the 45-degree influence zone of the existing house’s foundations. Such misalignment causes masonry cracking in both the new extension and the original structure. Users encounter visible signs like cracked walls and uneven floors, which compromise safety. I recommend consulting a structural engineer early. They assess site conditions and design appropriate foundations. Specialists ensure compatibility between old and new.

    Poorly matched foundations for specific soil types result in excessive settlement or even collapse. Clay soils pose particular risks, as they swell and shrink with moisture changes. Nearby trees exacerbate this, potentially causing heave or subsidence if not considered. Tree roots draw moisture from the soil, leading to foundation movement. Avoid planting large trees close to your extension. Existing mature trees demand evaluation during planning.

    Standard foundation costs range from £800 to £1,500 per linear metre, adding up to £5,000 to £9,000 for a 12m² extension. These figures vary by location and soil complexity. Budget for these as a core expense. Cutting corners here invites costly repairs later.

    A strong connection between the new extension and the existing house structure prevents instability. Poor detailing invites differential movement and cracking at the junction. I advise using reinforced concrete beams or steel ties for seamless integration. These elements distribute loads and resist shifts.

    Key Considerations for Excavations

    Excavations for foundations must stay stable and shored to avoid collapse during construction. Working in tight spaces near existing structures heightens risks. Trenches can cave in without proper support. Hire certified professionals for shoring. They use hydraulic props or trench boxes to secure sides.

    Properly connecting and designing new structures boosts safety and durability for both the extension and the original home. This focus maintains integrity across the property. Users gain peace of mind with expert oversight. I ensure designs meet Building Regulations, guarding against hidden pitfalls like those from relaxed planning regimes. Even relaxed rules for rear additions don’t exempt builders from solid engineering principles. Bi-fold doors and kitchen-diners benefit from this foundation strength, remaining functional over time. Structural knock-throughs, meanwhile, depend on these beams to bridge old and new without compromise.

    I tailor solutions to regional variations, balancing national reforms with local plan specifics. Always prioritize Part A compliance. This approach prevents planning shortcuts from undermining structural soundness. Users avoid disputes by documenting all decisions. Foundations form the bedrock—get them right from the start.

    Party Wall Act 1996: When Your Extension Requires Neighbour Agreements and What It Costs

    I assess the Party Wall etc. Act 1996 closely when planning single-storey rear extensions. This legislation comes into play if your project touches or gets close to a shared wall, your neighbor’s foundations, or crosses a boundary line. You’ll need a Party Wall Award to proceed legally.

    The Act demands that property owners serve formal notices on neighbors who might be affected. These notices outline the proposed work and give neighbors a chance to respond. If they agree, you move forward smoothly. But missed notices or disagreements can lead to disputes. Neighbors might claim damages for any issues arising from the build. In worst-case scenarios, they could seek injunctions that stop your extension in its tracks.

    To handle notifications professionally, I recommend hiring a Party Wall Surveyor. This expert mediates between you and your neighbors. Budget at least 12 weeks for the process to avoid delays.

    Key Scenarios for Party Wall Involvement

    Your rear extension might require a Party Wall Award in these situations:

    • You’re excavating within 3 meters of a shared boundary or interfering with neighboring foundations.
    • The works involve underpinning an existing party wall or rebuilding it.
    • You’re constructing new walls across boundaries or on border lines.

    Understand that even small extensions can trigger this if they breach those limits. I advise checking with a surveyor early to confirm risks and compliance.

    Surveyor Fees and Financial Impact

    Costs vary based on surveyor involvement:

    1. One surveyor handling both sides often charges £1,000 to £1,800 for a job. This setup saves money and minimizes conflicts. Opt for it if possible.
    2. When each party selects their own surveyor, expenses climb. Each neighbor pays their surveyor’s fees, totaling £1,500 to £3,000 or more per party. These figures include surveys, agreements, and site visits.

    Factor in potential extras like legal fees if disputes arise.

    Always plan for these costs upfront. They represent a significant expense in extension budgets. I ensure clients account for them during initial consultations to prevent surprises.

    Real Build Costs for 2025: Materials, Labour and Why Professional Fees Are Non-Negotiable

    I analyse how national reforms to the National Planning Policy Framework and permitted development interact with local plans. These changes simplify permissions for rear kitchen-diners, bi-folds, and structural knock-throughs. Yet, even with relaxed planning, Building Regulations Part A and careful beam design remain critical. You must verify structural integrity to avoid future problems.

    All these costs are approximate and exclude VAT, varying by location, ground conditions, specification, contractor availability, and project complexity. Always include a 10–15% contingency for unexpected surprises.

    Estimated Build Costs Per Square Metre

    Build costs per square metre for a single-storey rear extension rise based on the finish level:

    • Basic spec: £2,000 to £2,800 + VAT with standard finishes
    • Mid-range spec: £2,800 to £3,500 + VAT with higher quality finishes and more complex structure
    • High-end spec: Exceeds £3,500 + VAT for premium or intricate designs

    Typical Breakdown for a 12m² Extension

    For a 12m² extension, expenses might divide like this:

    • Masonry components: £3,000 to £6,000
    • Roof structure: £1,500 to £3,000
    • Windows and doors: £3,000 to £8,000+
    • Internal finishes: £6,000 to £12,000

    Labour Costs

    Labour represents 50–60% of total costs, bringing these figures to life. Below are typical daily rates:

    • Builders or groundworkers: £200–£350 per day
    • Bricklayers: £200–£300 daily
    • Carpenters and roofers: £200–£400 per day
    • Electricians and plumbers: £250–£400 each day
    • Plasterers: £200–£350 daily

    I recommend hiring skilled professionals to meet deadlines and maintain quality standards.

    Professional Fees: A Non-Negotiable Investment

    You cannot skip professional fees—they ensure safety and compliance. Architects or designers typically charge between £800 to £3,000+ depending on the scale. These investments prevent costly errors later. I stress allocating that 10–15% contingency for issues that pop up during construction. This approach keeps your project on track.

    What Happens When You Ignore Building Regulations: Enforcement, Insurance and Selling Nightmares

    I always stress how national reforms reshape the National Planning Policy Framework, loosening permitted development rights to boost home extensions. This interacts with local plans, offering homeowners more freedom for single-storey rear projects like kitchen-diners and bi-folds. Yet, even with these changes, Building Regulations Part A demands full compliance, insisting on solid beam designs and structural integrity. Skirt these rules, and you court disastrous outcomes.

    Local Authority Building Control or an Approved Inspector often steps in with enforcement notices. These require immediate fixes or, in extreme cases, demolition. Buyers reject properties without proper sign-off documents from solicitors, since lenders demand them before mortgages. Insurance companies void policies upon discovering unregistered alterations, leaving you exposed to hefty claims.

    Go beyond permitted development limits—for instance, stretching size, height, or using mismatched materials—and the build turns unlawful. Local planning enforcement can shut you down. Structural mishaps loom large without regs.

    Key Structural Failure Risks

    • Faulty load-bearing setups cause walls to bulge or crumble.
    • Roof timbers that are too thin or poorly placed sag under weight, risking collapse.
    • Weak joints create unstable nodes throughout the structure.
    • Unbraced roofs fail fast against wind or snow loads.

    In short, bypassing regs invites financial drains, legal battles, and severe safety threats. Even relaxed planning shifts can’t override these basics; get solid advice early to avoid pitfalls.

    For more details about permitted development rights and compliance, visit the official UK Government technical guidance.

    https://www.youtube.com/watch?v=aEwGcyJRAf0

    Sources:
    Planning Portal – “https://www.planningportal.co.uk/”
    UK Government – “The Town and Country Planning (General Permitted Development) (England) Order 2015”
    UK Government – “Structure: Approved Document A”
    UK Government – “Fire Safety: Approved Document B”
    UK Government – “Site Preparation and Resistance to Contaminants and Moisture: Approved Document C”
    UK Government – “Conservation of Fuel and Power: Approved Document L”
    UK Government – “The Party Wall etc. Act 1996”

  • House Extensions 2.0: Why Councils And Lenders Are Getting Tougher On Beam Calculations And Paperwork

    House Extensions 2.0: Why Councils And Lenders Are Getting Tougher On Beam Calculations And Paperwork

    Councils and mortgage lenders are heightening their focus on the structural elements of home extensions, specifically RSJs (Rolled Steel Joists) and padstones, due to rising concerns over unregulated alterations and the resulting financial implications.

    Key Takeaways

    • Increased Scrutiny: Both councils (via Building Control) and mortgage lenders are now requiring more thorough proof of structural safety and proper installation in house extensions.
    • Structural Engineer Essential: It is vital to engage a qualified Chartered Structural Engineer at the earliest stage of the project to handle design, calculations, and ensure adherence to UK building regulations.
    • Significant Cost Beyond the Beam: Budgeting should go beyond just the physical RSJ; consider professional fees (engineers, Building Control inspections), party wall surveyor fees, and material costs.
    • Documentation is Key: Maintain a complete record of all structural certificates and documentation. These should be organised into a sales pack to avoid delays or potential issues during refinancing or future sale of the property.
    • Party Wall Act Awareness: Homeowners must be mindful of the Party Wall Act 1996 which requires written notice to be served to adjoining owners for certain types of work. This is crucial to avoid legal complications and avoidable expenses.

    In conclusion, failing to meet these new expectations could result in delays, higher costs, or difficulty securing financing. Proactive planning and proper documentation are now more important than ever for successful home extension projects.

    The True Cost of Structural Soundness: Why That Four-Metre Beam Costs More Than Steel

    Builders face growing pressure from councils and lenders to ensure every extension includes solid structural backing. Erecting a four-metre beam requires more than just steel for stability. Costs escalate with compliance needs, turning a basic installation into a comprehensive investment. I see this pattern in every project: the true expense lies in expert fees, materials, and inspections that protect against future liabilities. Councils now demand detailed calculations upfront, while lenders scrutinize documentation to avoid mortgage risks. Skipping these steps invites hefty penalties, so plan accordingly.

    Full Investment Breakdown for Structural Compliance

    Expect to allocate a significant budget beyond the beam itself to meet 2025 UK standards. Professionals play a key role here; they guarantee designs hold up under regulations. Start with structural engineer fees, which cover calculations and drawings.

    • For a standard domestic extension: £600 to £1,800 plus VAT.
    • Fees increase with job intricacies and location.

    Add in inspection visits at £150 to £300 each, plus VAT, to verify ongoing work. These checks catch issues early, preventing costly overruns.

    Building Control fees follow, ranging from £350 to £800 excluding VAT. These cover:

    • Plan reviews
    • On-site assessments, which vary by project scope and local authority

    Don’t overlook party wall surveyor fees if neighbors share walls. Expect:

    • £1,000 to £3,000 plus VAT per neighbor for an award
    • Owners typically foot this bill to avoid disputes

    This paperwork shields against legal tangles.

    Materials for a typical 4-metre steel universal beam add up quickly. A 203x133x25kg/m beam costs:

    • £150 to £300 plus VAT

    Pair it with:

    • Two pre-cast concrete padstones: £30 to £60 plus VAT
    • Ancillary items (props, packing, fixings): £100 to £200 plus VAT

    These components distribute loads evenly, vital for load-bearing structures.

    Skilled labor completes the build, with contractor rates from:

    • £1,500 to £3,500 plus VAT, depending on access and complexity

    Contingency funds round out the package. Set aside:

    • 10% to 15% of your total budget for surprises like concealed utilities or hazardous materials

    The professional fees, often £1,000 to £5,000+, form a small slice of an extension’s cost but deliver crucial peace of mind. They enable smooth council approvals and lender satisfaction. Cutting corners here leads to remedial fixes that balloon expenses. I advise clients to prioritize these upfront elements. They transform a beam into a compliant, enduring feature. Lenders reward this diligence with easier financing. Councils reduce scrutiny on well-prepared submissions. Over-invest now, and you save long-term.

    Why Councils and Lenders Are Demanding More Than Just a Builder’s Word

    Councils, through Building Control departments, and mortgage lenders are increasingly pushing for more than verbal assurances from builders regarding structural extensions. This shift stems from concerns over unchecked home modifications and uninsured buildings. To address these, any structural changes require formal Building Regulations Applications that demonstrate compliance with Approved Document A.

    All submissions must originate from Chartered Structural Engineers bearing the qualifications MIStructE or FStructE. These credentials assure accuracy, accountability, and alignment with national standards.

    Building Control Requirements

    The Party Wall etc. Act 1996 requires property owners to issue formal notices and potentially obtain awards when altering or affecting shared walls or foundations. Both engineers and architects generally back their work with professional indemnity insurance, underscoring their professional responsibility.

    Allowing builders to choose key structural elements—like RSJs or padstones—without input from qualified structural engineers can pose major risks. Such practices compromise safety, legality, and future resale value.

    I recommend assembling all necessary certificates and documents in your sales pack. This helps prevent delays or disputes when it’s time to sell, refinance, or extend your property.

    Lender Scrutiny

    Mortgage lenders are increasingly strict due to the significant risks posed by uncertified alterations. Improper works can devalue properties or even make them unmortgageable. To avoid these outcomes, lenders now require verified documentation for any structural modifications.

    It is crucial to evaluate structural dossiers with diligence before investing in or authorizing property extensions. Doing so protects your financial interests, promotes public safety, and ensures full regulatory compliance.

    The Engineering Reality: What Those Beam Calculations Actually Mean for Your Extension

    Extensions change the core structure of a home. They introduce new openings in walls, blend different roof profiles, strengthen foundations, or add extra weight vertically. I always ensure builders use precise beam calculations to pick the best size, material—often steel RSJs, UBs, or UCs, sometimes timber or concrete for shorter spans—and connection details. These calculations follow Eurocodes and BS EN standards to avoid failures that could compromise safety or lead to costly rework.

    Building Control officials and mortgage lenders scrutinize these details more now. They demand verified data over guesswork to protect homeowners and comply with regulations. Skipping this step risks rejection of your planning permission or loan approval. I advise clients to engage qualified engineers early to produce detailed reports, including structural certificates, to smooth the process.

    Key Elements in Beam Calculations

    Accurate beam sizing considers several critical loads and forces. These elements ensure beams handle real-world stresses effectively and prevent issues like cracks or collapses.

    • Dead loads cover the constant weight of the structure and any finishes.
    • Imposed loads include dynamic weights from usage, such as furniture, occupants, or snow on roofs.
    • Wind loads account for external pressure or suction that could twist or displace beams.
    • Deflection limits control how much a beam bends, keeping it straight for both looks and strength.
    • Shear forces and bending moments help size beams precisely, ensuring they resist twisting and flexing.
    • Point loads address concentrated impacts, often requiring padstones or extra reinforcement under supports.

    I incorporate these into every design I work on. Modern extensions demand this level of rigor because councils and lenders prioritize reducing homeowner risks and enforcing strict safety rules. Without verified calculations, your extension might face delays or denial during approvals. Consult an engineer with expertise in these standards to avoid pitfalls and keep your project on track.

    https://www.youtube.com/watch?v=IoTFOiSakoBQ

    When Cutting Corners Costs Six Figures: The Real Risks of Missing Structural Certificates

    I often see homeowners and builders skip structural certifications to save time and money on house extensions. Yet, this shortcut exposes properties to serious flaws that lenders and councils now scrutinize closely. They focus on extension RSJs, padstones, and missing paperwork, knowing oversight leads to disasters.

    Common problems from inadequate structural work hit hard:

    • Undersized or misaligned beams cause masonry cracking.
    • Excessive deflection leads to sagging roofs or joists.
    • Point load failures crush masonry or foundation elements.
    • Worst, disproportionate collapse occurs when one failure triggers broader damage.

    What Happens When Compliance Fails

    Building control officers issue immediate stop work notices or enforcement orders. They may demand demolitions or full redesigns in extreme cases. Non-compliance draws fines up to £5,000. Criminal prosecution follows for repeated issues.

    Insurance suffers too:

    • Policies are voided if they cover undocumented works.
    • Claims get refused on those faults.
    • Public liability claims rise for injuries or damages caused by shoddy builds.

    From a lending viewpoint, missing certifications hold up mortgages. Some properties become unmortgageable. Devaluation hits hard, slashing values by tens of thousands.

    Legally, skipping party wall notices sparks injunctions and lawsuits. Owners pay neighbours’ legal fees and damages. I advise always involving qualified engineers early to avoid these traps. Their input prevents six-figure bills from delays, strained relations, and blocked sales. Examiners demand solid calculations and certificates now, so I push for proactive checks to keep projects on track.

    The Beam Doctor’s Non-Negotiable Protocol: Why the Structural Engineer Comes First, Not Last

    I view hiring a Chartered Structural Engineer right at the project’s onset as compulsory. Builders might pressure you to skip early steps, but this approach builds a solid foundation for success. A qualified engineer, such as one accredited through MIStructE or FStructE, evaluates feasibility swiftly. They pinpoint potential challenges with beams or load-bearing walls before you dig into costs.

    Controllers and lenders demand strict proofs, especially for those RSJs and padstones in extensions. They won’t approve plans without solid calculations. My advice holds: position the engineer at the forefront to guide design from concept. He translates vague ideas into compliant structures aligned with British Standards and Eurocodes. His PI insurance covers risks, blocking costly rework.

    Builders sometimes cut corners to lowball quotes, yet engineers intervene to avert errors. Visualize a home with a flawed extension—lenders reject mortgages on such properties. Buyers flee when certificates vanish from packs. I recommend involving the engineer early so his drawings streamline approval processes. This saves time and headaches.

    Consider these key benefits from early inclusion:

    • Precise cost forecasts prevent surprises in extensions.
    • Designs adapt to site specifics without altering budgets.
    • Structural integrity boosts resale value and safety.

    Engineers advocate for your home’s future rather than adding paperwork. Councils scrutinize beam details intensely these days. Lenders verify every calculation for fraud risks. Heed my protocol: make the structural engineer your first partner. It ensures structures stand firm and sales proceed smoothly.

    https://www.youtube.com/watch?v=2Emob_PxpQwn2M

    When Your Neighbour Has a Say: The Party Wall Act No One Tells You About

    Extending your home often means dealing with structures shared between properties. The Party Wall etc. Act 1996 kicks in here, requiring you to serve notices if your plans affect shared walls, excavate near neighboring foundations, or build right on the boundary. This law protects both sides, preventing conflicts before they start. I see many homeowners overlook it, but understanding its rules saves you time and money.

    Key Requirements of the Act

    The Act demands formal notices to neighbors for specific works. If your project touches a party wall, like adding a RSJ (Rolled Steel Joist) for an extension, you must alert them in writing. Surveys might reveal subsidence risks or structural issues, which this process helps address early. For excavations—say digging foundations close to a neighbor’s property—you need to notify them too. Ignoring these steps invites trouble. Neighbors can object, forcing an award that outlines how work proceeds.

    • Written notice required for work on party walls
    • Notice also needed for excavation near adjoining structures
    • Risk of subsidence or shifting structures investigated by surveyors
    • Neighbors can dispute, leading to a formal party wall award

    Managing Notices and Fees

    Often, agreements come easily, but if a neighbor disagrees or stays silent, you appoint surveyors. Each party might hire their own expert, splitting costs between you and the neighbor—though you usually cover the full bill. I estimate these fees run £1,000 to £3,000 plus VAT per neighbor, depending on the job’s scale. Skimping on this invites disputes that can derail your project. Hire qualified surveyors to keep things smooth. They draft the award, detailing protections like crack monitoring during construction. This not only complies with lending rules but also builds trust with your neighbor.

    1. Attempt to reach an agreement with the neighbor after serving notice
    2. If disputed or ignored, appoint separate surveyors
    3. Surveyors draft a party wall award to set out how work will proceed
    4. Expect to pay £1,000–£3,000 + VAT per neighbor

    For more information on the Party Wall Act, you can visit the UK government’s official source on the topic: Party Wall etc. Act 1996 Guidance.

    https://www.youtube.com/watch?v=WJ5MeBjaioU

    Sources:
    The Institution of Structural Engineers (IStructE) – Membership requirements, professional standards, guides.
    UK Building Regulations 2010 (as amended) – Approved Document A (Structure).
    The Party Wall etc. Act 1996 – Legislation governing party wall matters.
    The Royal Institution of Chartered Surveyors (RICS) – Guidance on Party Wall procedures and valuation.
    The Planning Portal (UK Government) – Information on Planning Permission and Building Regulations.
    Various UK Local Authority Building Control Departments – Fee schedules and application guidance.

  • Green Loft, Heavy Roof: How Solar Panels And Storage Are Overloading Old Uk Roof Structures

    Green Loft, Heavy Roof: How Solar Panels And Storage Are Overloading Old Uk Roof Structures

    Solar panel installations on older UK homes create serious structural risks that many homeowners overlook. Houses built between the 1930s and 1970s face particular challenges when supporting modern renewable energy systems. I’ve seen firsthand how these well-intentioned upgrades can overwhelm aging roof structures.

    Key Takeaways

    • Increased Load Risks: Solar panels and battery storage significantly increase the dead load on roofs built before modern Eurocode benchmarks, particularly impacting traditional cut timber roofs.
    • Weather Amplifies Issues: Snow and wind conditions exacerbate the stress on older roofs that weren’t designed to withstand the combined forces.
    • Structural Assessments are Crucial: Professional structural assessments are essential before installing solar or battery systems to identify potential weaknesses and ensure safety.
    • Timber Degradation: Moisture, pests, and age weaken timber components over time, making older roofs more vulnerable to failure under increased loads.
    • Traditional vs. Trussed Roofs: Traditional cut timber roofs require careful inspection, while post-1970s trussed roofs can be compromised by modifications and need lightweight systems with even weight distribution.

    Structural Concerns with Older Roofs

    The structural engineering community has documented numerous cases where solar installations caused visible sagging, cracking, and in extreme cases, partial roof collapse. Traditional cut timber construction methods used in pre-1970s homes simply weren’t calculated to handle today’s solar loads. Modern building standards include safety margins that older structures lack completely.

    Importance of Professional Assessment

    Professional assessment becomes critical before any installation proceeds. Structural engineers can identify weak points, calculate load capacities, and recommend reinforcement strategies. Skipping this step often leads to expensive repairs and potentially dangerous situations.

    Weather and Load Interaction

    Weather conditions compound these structural concerns significantly. Snow accumulation combined with panel weight creates loading scenarios that exceed original design parameters. Wind uplift forces also interact differently with panel-mounted roofs, creating stress patterns the original builders never anticipated.

    Final Recommendations

    I recommend thorough inspection of timber condition, joint integrity, and load-bearing capacity before proceeding with any solar project on pre-1980s homes. The investment in professional assessment protects both property value and occupant safety.

    Why Your 1950s Roof Might Not Survive Your New Solar Panels: The Weight Crisis Hitting UK Homes

    I often see homeowners rushing to install solar panels and battery storage on older properties, unaware that these additions impose far more strain than the roofs can bear. Those pre-1970s homes, built with simple timber frames, followed load standards far below today’s Eurocode benchmarks. A standard 4kWp system of 16 panels spans 25-30 square metres and weighs 250-450kg total, with crystalline silicon panels at 10-15 kg/m² plus mounting hardware. This dead load piles onto structures designed for lighter burdens.

    Heavy Impacts from Storage and Mounting

    Battery packs raise the stakes further. A 5-10kWh lithium-ion unit tips the scales at 80-150kg, often placed in lofts where it creates concentrated point loads. Inverters throw on another 20-40kg. I advise clients to spread these weights evenly if possible, but retrofitting rarely allows that. Traditional cut timber roofs, unlike modern trussed ones, lack the engineered strength to distribute loads well. Over decades, wood weakens from moisture and pests, making failures more likely.

    When Weather Compounds the Problem

    Snow and wind interactions worsen matters. Panels can catch more snow, accumulating to 0.6 kN/m² in southern England or 1.2 kN/m² in the Scottish Highlands, per BS EN 1991-1-3. They also disrupt airflow, boosting wind uplift or suction per BS EN 1991-1-4. Older roofs, never tested for such combos, may deflect or collapse under the pressure.

    I recommend structural assessments before installation:

    • Use lightweight panels where possible
    • Distribute systems across multiple locations
    • Resist overloading with oversized batteries

    This trend of greening old roofs saves money long-term, but only if you fortify them first. Check your timber for rot and bolster where needed. Ignoring this invites costly damage or danger.

    What Actually Fails: The Structural Breakdown Hidden in Your Loft

    Old UK roofs from the 1930s to 1970s bear the weight of decades, yet adding solar panels and battery storage introduces forces they weren’t built for. Excessive deflection causes rafters and purlins to bend beyond acceptable limits, like L/300 to L/400, which affects the roof line and leads to sagging ceilings. You can often see this as drooping ridges that compromise aesthetics and invite water through new gaps in the tiling and underlay.

    How Deflection and Sagging Manifest

    Timber fatigue from overloaded rafters often results in cracking plasterboard or lath ceilings below. Central joists twist under uneven loads, pushing gypsum or horsehair renders to their limit. Historic nails loosen over time, widening cracks that allow damp to enter. It’s critical to inspect for these signs before installation, ensuring modern systems distribute weight evenly to avoid premature wear and failure.

    Point Loads and Progressive Risks

    Battery systems’ concentrated masses create point load failures, potentially punching through joists if not installed with proper padstones that transfer force directly to load-bearing walls. Inverters pose similar risks unless they are braced securely against party walls or reinforced supports. Shear forces in traditional joints—like birdsmouth or mortise and tenon—increase when tensile loads rise, leading to joint failure especially where rot is already present.

    This overload burdens adjacent rafters and can cause a progressive collapse, a chain reaction of structural breakdown across the roof. Accelerated decay from membrane defects worsens the scenario, enabling moisture ingress that corrodes electrics and rots timber supports at their foundations.

    To mitigate these risks, I strongly advise structural surveys for any roofing system on pre-1970s buildings. Follow these preventative steps:

    • Use engineered mounts that span multiple rafters for solar panels
    • Place battery racks directly over sturdy beams or padstones
    • Check for signs of wood rot and nail loosening in older timbers
    • Ensure inverters are installed with adequate lateral bracing

    Spot reinforcement early prevents catastrophic shifts, enabling you to embrace green energy without compromising the safety and character of heritage homes.

    The Real Cost of Getting Your Roof Ready for Renewables

    I dive straight into the numbers that hit UK homeowners hardest when we bolt solar panels and battery storage onto those cherished 1930s to 1970s roofs. These structures weren’t built for today’s heavy tech loads, so we often reinforce the rafters, purlins, and party walls to handle the extra weight. Professional help starts the process, and I always recommend it early to avoid surprises.

    I begin with a structural engineer who surveys your site and assesses feasibility. Expect fees ranging from £350 to £600 plus VAT for that visit and review. This step confirms if your roof can take the strain without cracking under the photovoltaic panels’ dead load, typically 15-25 kg per square metre, plus dynamic loads from wind and rain.

    For deeper insights, commission a detailed structural survey and report. Fees here climb to £800–£1,500, outlining exactly where your timber rafters or purlins might fail. Factors like wood decay in older homes amplify risks, so this report guides precise upgrades.

    If modifications go further, you’ll need a full structural design with drawings. I charge £1,500–£3,500 plus VAT based on complexity, ensuring our plans meet Building Regulations for roof alterations. This document sets the blueprint for any ongoing work.

    Navigating Fees and Permits

    Once designs lock in, submit applications to Building Control. Their approval cost sits at £300–£600, separate from engineering fees. Skipping this invites fines, so I file these applications immediately after our reports to streamline your project.

    Breaking Down Material and Labour Costs

    I break material costs into essentials for reinforcement:

    • C24 grade timber: £50–£150 per linear metre – ideal for sistering rafters or purlins to boost strength.
    • Steel flitch plates or Universal Beam RSJs: £300–£800 per 3-metre length – perfect for heavy-duty support.
    • Connectors (joist hangers, resin anchors): £50–£200 – to secure everything firmly.
    • Padstones: £20–£50 each – crucial under new beam placements to prevent foundation shifts.

    Labour drives expenses higher still:

    • Skilled carpenters: £250–£400 per day – for installing timber and fittings.
    • Steel fabricators: £350–£600 daily – for welding and mounting RSJs.
    • Scaffolding: £800–£2,500 per home – ensures safe access on pitched roofs.

    Total strengthening works vary widely:

    1. Minor reinforcements: From £2,500 – covering quick fixes for lightweight panels.
    2. Major overhauls: Up to £12,000 plus VAT – especially for full rafter replacements in multi-storey homes.

    Including professional fees, expect £4,000–£18,000 plus VAT overall per project. I also factor in potential extras like professional indemnity insurance for engineers, adding peace of mind against liability claims.

    These figures reflect current UK markets but fluctuate with supplier rates and project scale. I advise homeowners to:

    • Get multiple quotes
    • Check for VAT implications
    • Consider incentives like the Green Homes Grant for partial reimbursement
    • Time upgrades during warmer months to cut labour downtime

    Fifty years ago, roofs coped with slate alone, but today’s renewables test their limits, demanding we act now to prevent costly failures down the line.

    https://www.youtube.com/watch?v=4shD2fHasnM

    The Legal Minefield: Building Regulations, Insurance, and Party Walls

    I see many homeowners rushing to add solar panels and battery storage without considering the rules. These systems can strain roofs built before modern standards, so staying compliant feels tricky yet crucial.

    Navigating Building Regulations

    Significant load changes require adherence to Approved Document A (Structure). This means submitting plans and getting Building Control approval before installation. Skipping this step risks fines and complicates selling your home later.

    Approved Document B emphasizes fire safety, dictating that batteries sit in ventilated spots without weakening structural fire resistance. Similarly, Approved Document C insists on preserving roof weather integrity to block moisture ingress.

    Consider this practical step:

    • Consult a qualified structural engineer early. They evaluate your roof’s capacity and design compliant reinforcements.

    Doing so prevents enforcement issues and ensures long-term stability.

    Insurance and Party Wall Concerns

    Inform your insurer about any structural mods, like those from extra roof weight. Ignoring this can invalidate policies and block claims if problems arise.

    In shared properties, the Party Wall Act 1996 kicks in for changes affecting common walls or roofs. Serve formal notices to neighbors to avoid disputes.

    To stay safe, keep these tips in mind:

    1. Document everything.
    2. Keep records of approvals and communications handy.

    This proactive approach shields you from legal traps and fosters neighbor goodwill. Remember, overlooking these details turns a green upgrade into a costly liability.

    Why Your Solar Installer Cannot Sign Off on Structural Safety

    I always stress that a qualified UK Chartered Structural Engineer steps in before you mount any solar panels or battery storage on your roof. This isn’t optional; it’s a mandatory safety check.

    Solar Installers’ Focus and Limitations

    Solar installers excel at wiring and system efficiency. They don’t handle intricate structural checks. Most skip training on timber design under Eurocode standards like BS EN 1995. Their professional indemnity insurance won’t protect you if a roof collapses under extra weight. You need more than wiring know-how here.

    • Limited training on structural loads
    • No qualification in timber or roof design
    • Insurance typically excludes structural failures

    The Crucial Role of Engineers and Approvals

    Local Building Control demands approval for any work that boosts loads on rafters, purlins, or party walls. Structural engineers assess load paths through the roof structure, producing reports and drawings. These offer unbiased confirmation.

    Skipping this invites massive risks—think structural failure, injuries, and endless disputes. Costs from such problems dwarf the price of upfront assessments.

    1. Engineer evaluates structural supportability
    2. Engineer provides official documentation
    3. Building Control requires this for compliance

    I prioritize structural design stability over green ambitions. It safeguards your property’s long-term value. Consult an expert first; it aligns quick solar adoption with solid engineering. Your roof deserves that balance.

    The Vulnerable Roofs: Traditional Cut Timber vs Modern Trusses

    Many homeowners are embracing the green energy movement, eagerly installing solar panels and battery storage on homes built between the 1930s and 1970s. While the intentions are commendable, this surge in installations places strain on rooftop structures that were never designed for such added weight. Among these, traditional cut timber roofs are particularly at risk.

    Pre-1970s Traditional Cut Timber Roofs

    Homes built before the 1970s often feature traditional cut timber roofs. These structures depend on solid wood components, connected using methods like birdsmouth joints, mortise and tenon joints, and nails. Rafters typically span from the ridge to the wall and are supported by ridge boards, purlins, and ceiling joists.

    While these elements may appear robust, decades of moisture exposure, pest activity, and general wear can degrade the timber, making it less capable of bearing extra weight. In many cases, previous alterations such as loft conversions have already introduced additional stress. Adding solar panels without considering these factors could lead to structural failure.

    Key recommendations:

    • Inspect the timber for rot, warping, or pest infestation.
    • Have a structural engineer assess the roof’s current load capacity.
    • Check historical alterations to ensure they didn’t compromise the structure.

    Post-1970s Trussed Rafter Roofs

    Homes built after the 1970s commonly incorporate trussed rafter roofs, known for their cost-effective and efficient design. These roofs utilize pre-fabricated triangular timber frames that comply with building regulations but only allow for minimal load beyond what they were designed to support.

    Modifications, particularly cutting into internal webs for storage or conversions, can severely undermine their integrity. When it comes to installing solar PV systems or heavy battery units, these roofs may falter unless they’re properly evaluated and reinforced.

    Best practices include:

    1. Use lightweight panel systems whenever possible.
    2. Distribute weight evenly across multiple trusses.
    3. Consult with building control authorities before starting any retrofitting work.
    4. Avoid overloading shared (party) walls; anchor systems to structural rafters instead.

    When in doubt, work with experienced professionals to ensure solar and battery installations are safe, sustainable, and structurally sound. The move to greener energy shouldn’t come at the cost of a compromised roof.

    To understand the structural consequences further, here’s a helpful video:
    https://www.youtube.com/watch?v=1gYikA_TV8U

    Sources:
    Institution of Structural Engineers IStructE: The Structural Engineer’s Role in Residential Property
    UK Government, The Building Regulations 2010: Approved Document A Structure
    UK Government, The Building Regulations 2010: Approved Document B Fire Safety
    BS EN 1991 Eurocode 1: Actions on structures
    BS EN 1995 Eurocode 5: Design of timber structures – Part 1-1: General – Common rules and rules for buildings
    National House Building Council NHBC: Standards 2024, Chapter 7.2 Roofs
    Party Wall etc. Act 1996