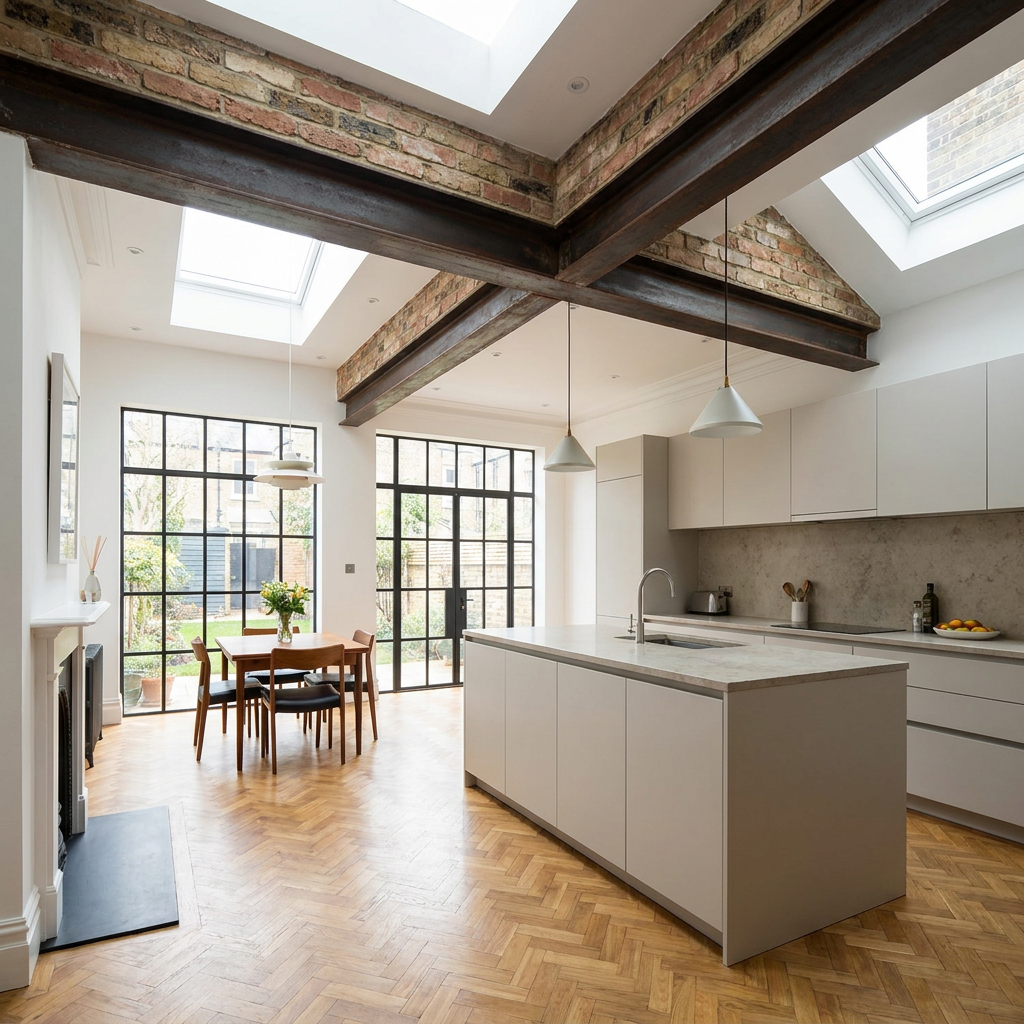
You’re planning to open up a ground floor in a 1950s London house and you want to know what’s actually involved in getting an RSJ installed safely and legally. It’s a very common project — and one where the details really do matter, particularly in post-war semi-detached and terraced properties that have their own structural quirks.
Key Takeaways
- 1950s London houses have specific structural characteristics that affect how an RSJ installation is designed and specified.
- You’ll need a structural engineer’s calculations and Building Regulations approval before any load-bearing wall comes down.
- Temporary propping is essential — removing support without Acrow Props in place can cause immediate and serious structural damage.
- Padstones distribute the beam’s load into the masonry below; getting them right is as important as sizing the beam itself.
- Party walls are common in 1950s London terraces — you may have obligations under the Party Wall Act 1996 before work begins.
What Makes 1950s London Houses Different
London’s post-war housing stock — built roughly between 1945 and 1965 — tends to follow fairly consistent patterns, but there are enough variations to catch out builders and homeowners who assume one house is much like another. Most of these properties are two-storey terraced or semi-detached houses with cavity brick walls, timber intermediate floors, and relatively modest foundations. The ground floor internal walls are often load-bearing, carrying the floor joists above and sometimes the roof structure beyond that.
One thing I see regularly in this era of property is the use of lightweight concrete blocks alongside traditional brick, particularly in internal partitions built during or just after construction. These blocks can look structural but sometimes aren’t — and vice versa. That ambiguity is exactly why a proper structural assessment matters before you commit to any wall removal.
Another consideration is the condition of the existing masonry. Seventy-plus years of settlement, moisture movement, and the occasional bodged repair means the brickwork you’re bearing your new beam onto may not be in the condition it appears. I always check the state of the supporting piers and the wall below the proposed beam position before I sign off any calculations. Weak or spalled brickwork changes the padstone specification and sometimes the beam size itself.
Do You Actually Need an RSJ?
Not every wall removal in a 1950s London house requires a steel beam. Shorter spans — typically under about 1.8 m in a lightly loaded situation — can sometimes be handled with a reinforced concrete or timber lintel. But for the kind of open-plan kitchen-diner project that most homeowners are after, you’re usually looking at a span of 3 m or more, and at that point a steel universal beam (the RSJ) is almost always the right solution.
The term RSJ is widely used in the trade and by homeowners, though strictly speaking it refers to a Rolled Steel Joist with a specific cross-section profile. Most modern installations use a Universal Beam (UB) section, which has a more efficient flange geometry. In practice, when a builder or homeowner says RSJ, they mean a steel beam — and that’s fine. What matters is that the correct section size is specified by a structural engineer based on the actual loads and span involved, not guesswork or what the last job used.
I’ve seen beams that were too small deflecting visibly within months of installation, and beams that were wildly oversized because someone played it safe without doing the sums. Both outcomes are avoidable with a proper structural calculation. Building Regulations Part A requires that structural elements are adequate for the loads they carry, and Approved Document A sets out the principles that underpin compliance.
The Structural Engineer’s Role — and Why You Need One
In England, installing a steel beam in a load-bearing wall is notifiable work under Building Regulations. That means you need Building Control involvement — either through your local authority or an approved inspector. And Building Control will require structural calculations prepared by a competent person. In practice, that means a structural engineer.
My job on a project like this is to assess the loads coming down through the structure above — dead loads from floors, walls, and roof; imposed loads from occupants and furniture — and calculate the bending moment and shear forces the beam must resist. From that I specify the steel section size, the bearing length at each end, and the padstone requirements. I also check whether the existing wall below the beam ends can take the concentrated point loads without needing strengthening.
For a 1950s London terrace, I’ll also want to know whether the wall you’re removing is a party wall shared with the neighbour. If it is, the Party Wall Act 1996 is triggered, and you’ll need to serve notice before work starts. This is separate from Building Regulations — it’s a civil matter between you and your adjoining owner — but it’s one that catches a lot of homeowners off guard.
Temporary Propping and the Installation Sequence
This is the part of RSJ installation that I think deserves more attention in guides aimed at homeowners, because it’s where things go wrong when the work is rushed or poorly planned.
Before any masonry is removed, the structure above must be temporarily supported using Acrow Props and spreader boards. The props transfer the load from the floor joists (or whatever is bearing on the wall) down to the ground floor slab or a suitable bearing point below. Get this wrong — use too few props, place them in the wrong position, or use inadequate spreader boards — and you risk cracking the structure above, or worse.
The typical sequence for RSJ installation looks like this:
- Temporary props installed on both sides of the wall, supporting the structure above.
- The wall is carefully removed to create the opening, leaving the masonry in the bearing zones intact until the beam is ready to go in.
- Padstones are bedded onto the supporting piers at each end.
- The steel beam is lifted into position — often requiring a small team and sometimes a chain block or beam lifter for heavier sections.
- The beam is packed tight to the structure above, the remaining masonry is made good, and the props are removed once the mortar has cured.
This sequence should be agreed between your structural engineer and your builder before work starts. I always include a note on propping requirements in my structural specification so there’s no ambiguity on site.
Padstones — The Detail That’s Often Overlooked
A padstone is a block of dense concrete or engineering brick bedded into the masonry at each end of the beam. Its purpose is to spread the concentrated point load from the beam end over a larger area of brickwork, reducing the stress at that point to something the masonry can safely carry.
The size of the padstone depends on the beam reaction (the load at each end), the bearing capacity of the masonry, and the geometry of the wall. I calculate the required padstone dimensions as part of my structural design. A common failure I see in work done without proper engineering input is either no padstone at all — just the beam sitting directly on a few courses of standard brick — or a padstone that’s the right material but the wrong size.
In 1950s brickwork, the mortar is often a lime-based mix that’s softer than modern cement mortars. That affects the bearing capacity of the masonry, and it’s one of the reasons I don’t apply generic rules of thumb to older properties. Each job gets its own calculation.
Building Control Sign-Off and Completion Certificates
Once the beam is in and the work is complete, Building Control will inspect the installation and, if satisfied, issue a completion certificate. This document is important — you’ll need it when you come to sell the property. Solicitors and buyers’ surveyors routinely ask for evidence that structural alterations were carried out with Building Regulations approval, and an absence of paperwork can delay or derail a sale.
If you’re buying a 1950s London house that has already had walls removed and beams installed, it’s worth checking whether there’s a completion certificate on file. If there isn’t, an indemnity insurance policy is sometimes used to resolve the issue, but it’s not a substitute for knowing the work was done properly. A structural survey can give you confidence about the condition and adequacy of the existing installation even where paperwork is missing.
The process of getting Building Control approval is straightforward when you have a structural engineer involved from the start. I submit calculations and drawings to Building Control as part of the design process, so by the time work starts on site, the inspector already knows what to expect.
When to Call a Structural Engineer
If you’re planning to remove any wall in a 1950s London house — even one you think might be non-load-bearing — you should get a structural engineer involved before work starts. The cost of a structural assessment is small relative to the cost of rectifying damage caused by removing a wall that was doing more than it appeared. Beyond wall removal, you should also call a structural engineer if you’re buying a 1950s property and want confidence that previous alterations were carried out correctly, or if you’ve noticed cracking, deflection, or other signs that the structure may not be performing as it should.
Need expert eyes on your project?
I’m Paul Kangunga, a Chartered Structural Engineer (CEng, MIStructE) based in Huddersfield. The Beam Doctor offers homeowners and builders:
- Steel beam (RSJ) calculations — Eurocode-compliant, Building Control-ready, in 5 working days. See all services and current fees →
- Defect investigation — I attend your property, inspect the cracking or movement, and give you a written opinion on the cause. The site visit is included in the price. See the fee bands →
- Structural Engineer’s Report — a signed desk-based opinion on a single structural concern, for a mortgage lender or an insurance claim. Request a report →
- On-site attendance — a Chartered Engineer at your property, tiered by duration. See site visit fees →
Leave a Reply